DIY Cool Cucumber Halloween Costume

Oct 28, 2016

DIY Cool Cucumber Halloween Costume

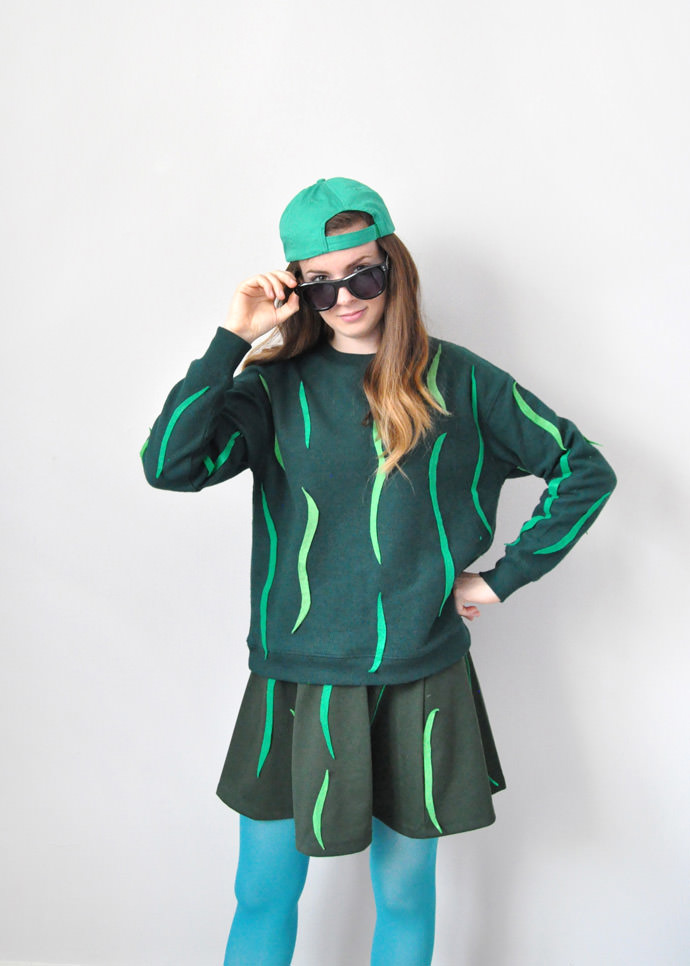
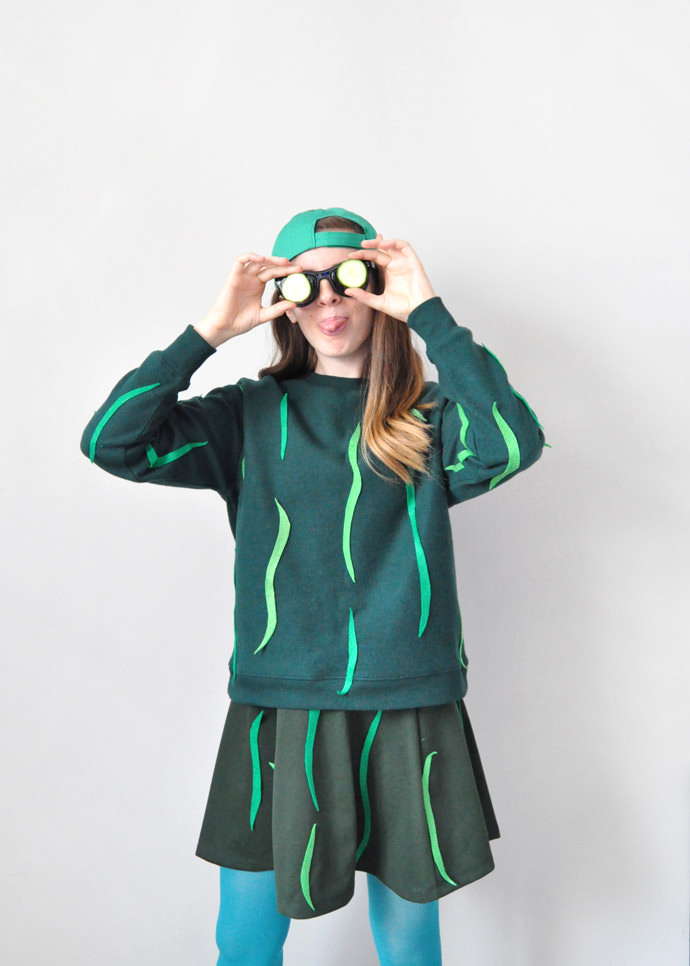
Halloween is just around the corner! Do you have your costume ready yet? I love coming up with ideas for silly costumes – other than creativity, my main priorities are practicality and comfort. With that in mind, I decided to dress up as a cool cucumber this year! Kind of silly, but so fun and easy to wear! I’ll be dressed up while I help run our local girl scouts’ Halloween party, so I needed to make sure to wear a costume I could still run around in to set up and run the games.

DIY Cool Cucumber Halloween Costume

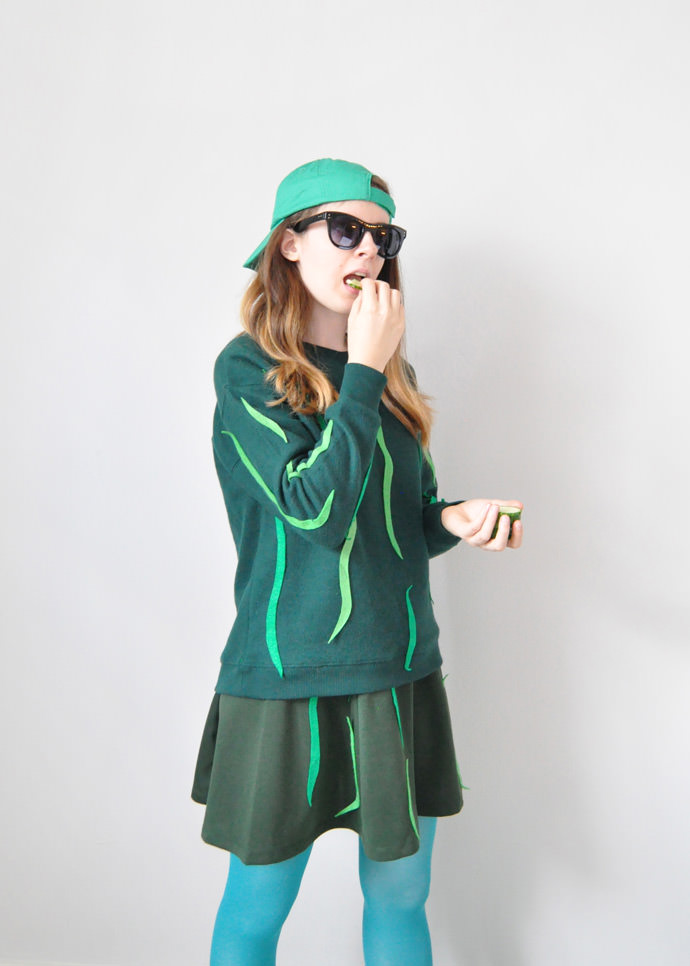
This costume is great for all ages – babies, kids, teens, and adults! Just pick out some green clothing from the thrift or discount store, and glue on some felt squiggles! If you don’t want your favorite green sweater to look like a cucumber forever, try using double-sided tape instead for a more temporary option.

What You Need

DIY Cool Cucumber Halloween Costume
  • Green felt
  • White glue
  • Scissors
  • Green clothes (shirt, pants/skirt, baseball cap)

How-To

DIY Cool Cucumber Halloween Costume

Step 1
Cut thin wavy strips out of green felt. Make some long, some short, and use different shades of green felt if you have them.

DIY Cool Cucumber Halloween Costume

Step 2
Lay the waves out on your green outfit – I arranged mine into vertical rows to imitate a cucumber’s texture.

DIY Cool Cucumber Halloween Costume

Step 3
Use white glue to secure the waves in place. Let dry completely. When dry, dress up! Use props like sunglasses, sliced cucumbers, or a skateboard to show how cool you are. ;)

DIY Cool Cucumber Halloween Costume DIY Cool Cucumber Halloween Costume DIY Cool Cucumber Halloween Costume

Happy Halloween!!

DIY Halloween Treat Bags

DIY Halloween Treat Bags

Halloween is just around the corner! We usually start the night off by walking around our neighborhood for trick-or-treating, and then we head back home to host our annual Halloween party!

DIY Halloween Treat Bags

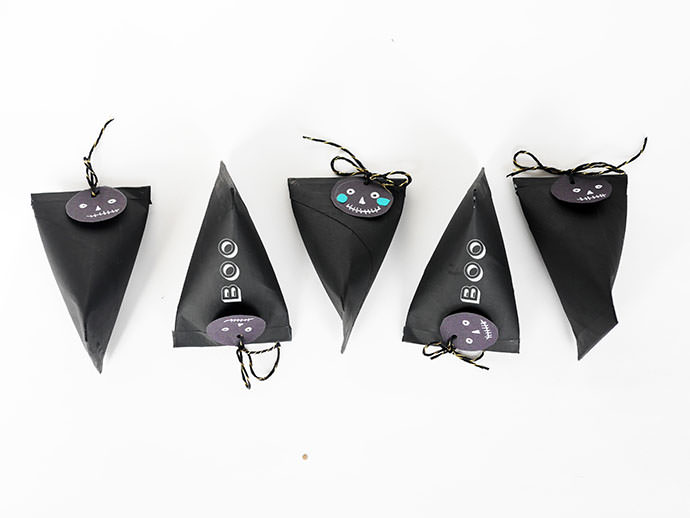
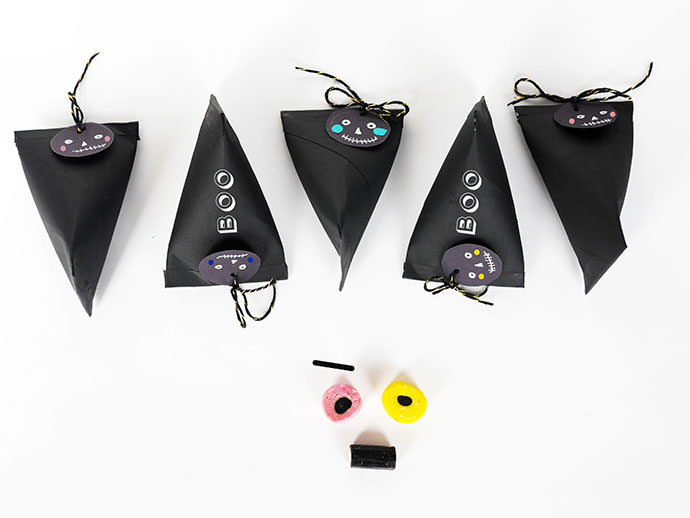
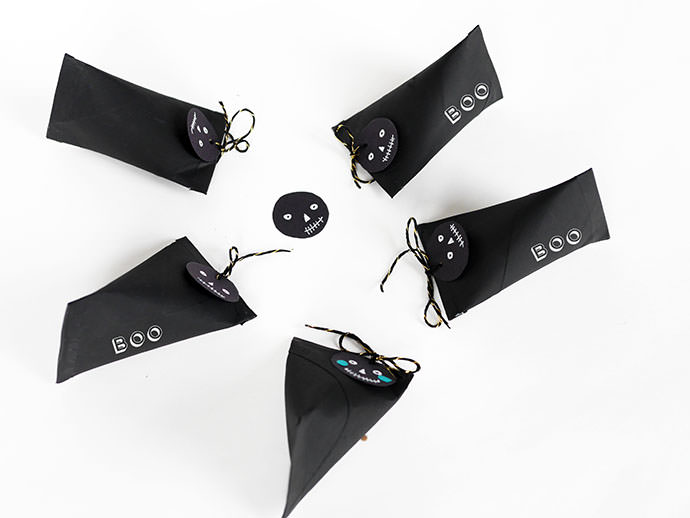
The kids (and adults!) love all the costumes, games, decorations, party food, and of course the loot bags. This year I decided to make my own mini treat bags – aren’t they adorable? Plus, they are super quick to make in case you, like me, are still finishing up your Halloween costume!

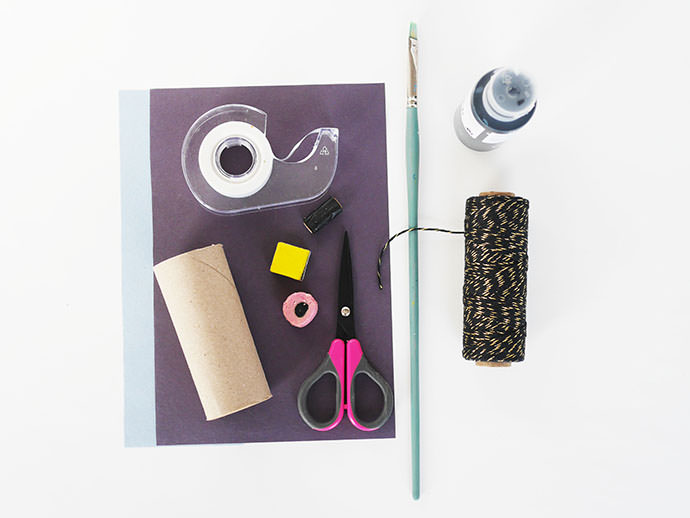
You don’t need much to make these DIY treat bags – just look around the house and gather up some empty paper towel or toilet paper rolls. With some paint and black paper, your favors will be done in no time! Oh and don’t forget to fill them with treats!

What You Need

DIY Halloween Treat Bags
  • Colored construction paper
  • Empty toilet paper / paper towel rolls
  • Scissors
  • Black paint
  • Paintbrush
  • Hole punch
  • Twine
  • Tape
  • Halloween treats!

How-To

DIY Halloween Treat Bags

Step 1
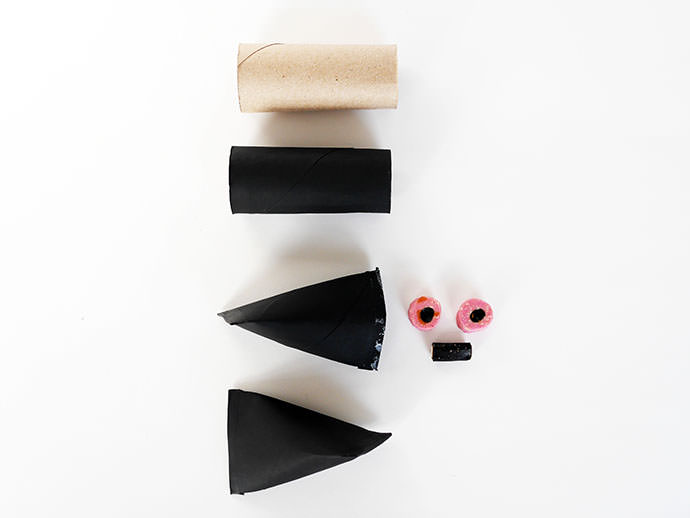
Paint your paper roll with black paint and let dry. Press one side of your roll together and tape it closed. For a nice finish I put a quick coat of black paint over the tape. Let dry again. Fill your roll with candies, homemade treats or mini chocolate bars.

Now this is the tricky part: twist the open end of the paper roll in the opposite direction. See the pictures below for reference.  To finish, close your roll and tape the sides together. Paint your tape in black again and let dry.

DIY Halloween Treat Bags

Step 2
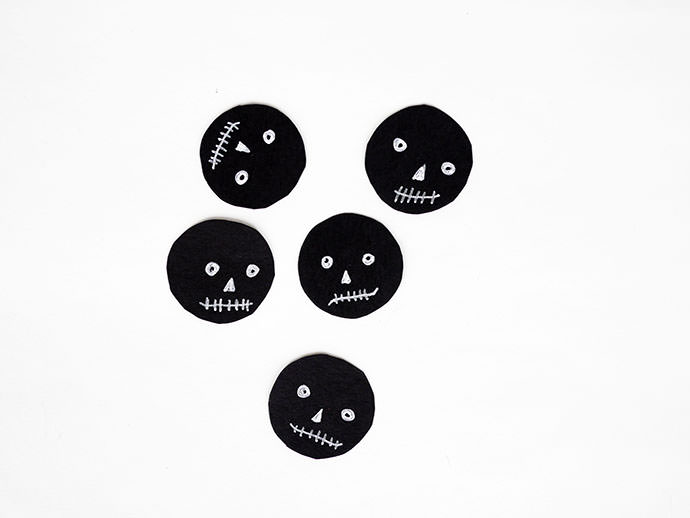
For the tag: draw a circle on your construction paper. Cut and decorate by drawing a funny Halloween face. On the other side, you can add names or messages if you like!
DIY Halloween Treat Bags

Step 3
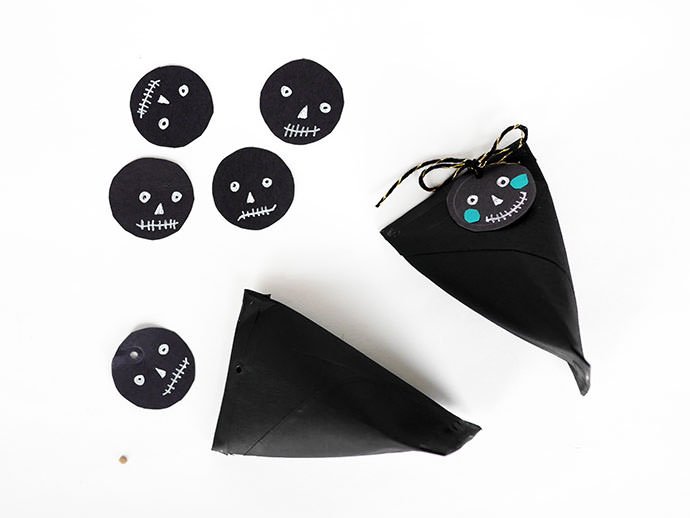
Use the hole punch to make a hole in both the face label and end of the sealed favor. Thread the  twine through your tag and favor, make a nice knot and voila! Repeat this craft for as many favors are needed.

DIY Halloween Treat Bags
Happy Halloween!

Shopping List: Play Ball

Oct 27, 2016

Shinola Detroit

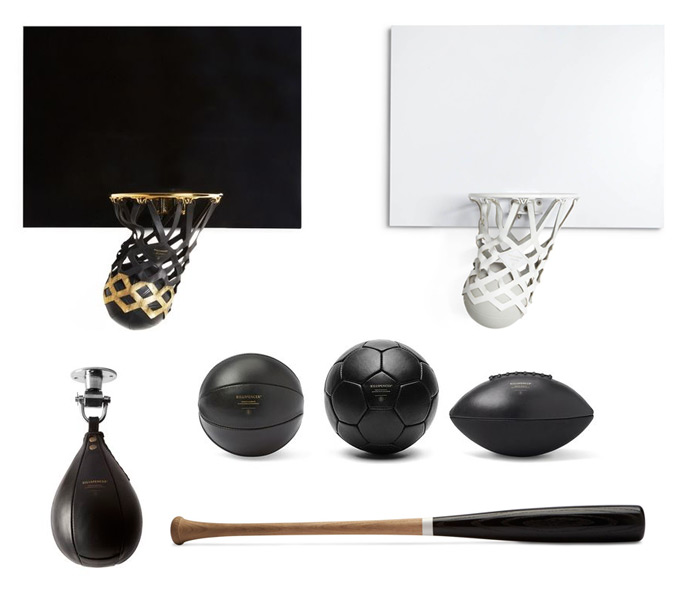
Shinola Handmade Leather Balls

Keep your eye on the ball with this collection of individually hand-cut and sewn leather footballs, basketballs, and baseballs from Shinola Detroit.

Mitchell Bat Co.

Mitchell Heritage-Inspired Baseball Bats

Mitchell Bat Co. has developed a cult following around their custom wooden baseball bats, hand-painted to order in crisp, bold colors.

Lineaus Athletic Co.

Lineaus Athletic Co.

From a workshop just outside Marfa, Texas, Lineaus Athletic Company handcrafts old-school leather medicine balls (considered the world’s best), training bags, and footballs.

Warstic Wood Bat Co.

Warstic Wood Bat Co.

Texas-based Warstic makes their bats from American White Ash, Rock Hard Sugar Maple, and Dense Yellow Birch, all designed for ultimate performance.

Killspencer

Killspencer Athletics

Best known for bags and accessories, Killspencer’s Athletic Collection features vintage-inspired, handcrafted gear for boxing, football, soccer, baseball, basketball, and more.

A Fresh Coat of Paint to Kick-Start Your Fall

Oct 19, 2016

A Fresh Coat of Paint to Kick-Start Your Fall

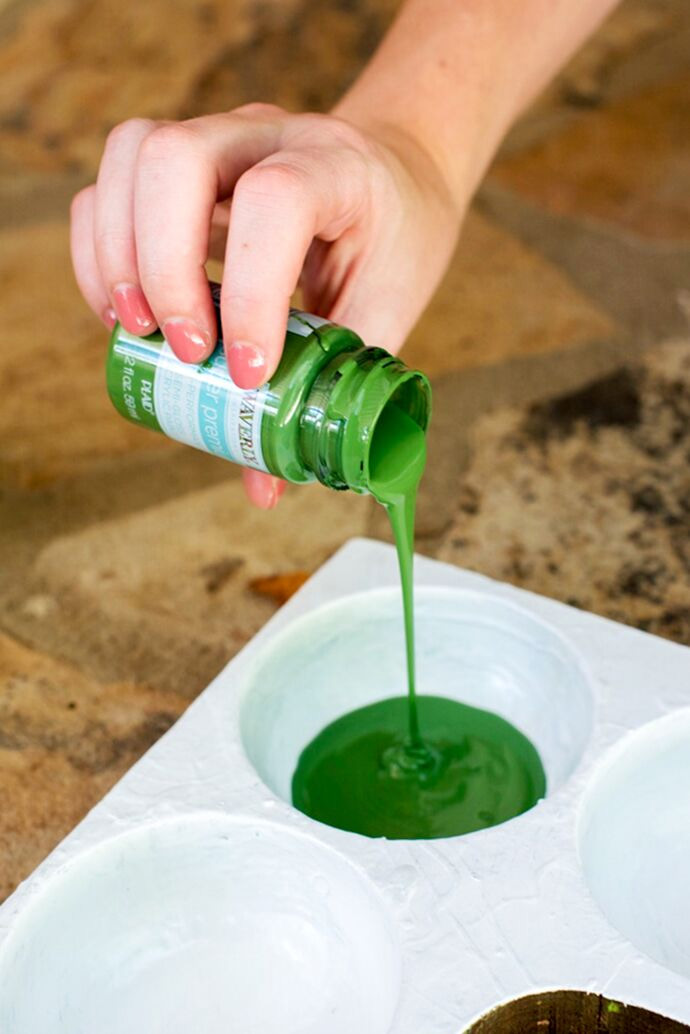
We recently collaborated with the styling + entertaining guru Annette Joseph to pull together our best tips for putting together a modern, stylish party in an affordable way. The centerpiece of the party was our tray of Waverly ® Inspirations Super Premium Semi-Gloss Acrylic Paints. These gorgeous, glossy paints are multi-surface and work flawlessly both indoors and outdoors. With 50+ shades to chose from, it was no easy feat to decide on a color scheme.

But now that the weather is cooling down and fall is in full view, we couldn’t resist throwing a nature-infused party. We covered everything from our front door to our place settings ranging in dreamy shades of lemon lime and evergreen.

A Fresh Coat of Paint to Kick-Start Your Fall

We count ourselves lucky to be living in Georgia – our home is surrounded by lush green forests and plant-life, which couldn’t have been more perfect for our nature-inspired party. Keeping mother nature’s amazing colors in mind, we decided to paint our front door evergreen to match the ferns that grow abundantly along the walkway. It was so simple to apply the paint and the resulting saturated blew us away. Waverly Inspirations’s new line of super premium semi-gloss acrylic paints is not only heavily pigmented, but extra durable too, perfect for high traffic areas like our front door.

We’ve called this barn home for 19 years with our 5 kids, while the barn itself has been around for over 50. We love the lived-in, cozy atmosphere that the exterior provides for our family. With the added bonus of a fade-resistant formula, we didn’t hesitate for a second before giving our door a colorful makeover!

A Fresh Coat of Paint to Kick-Start Your Fall

Isn’t is amazing how a simple coat of paint can make a world of a difference? Painting your front door is such an affordable way to change up the look of your house and add some high-impact curb appeal. Plus, our guests would get to see a sneak peak of the colorful party awaiting them inside! We were so pleased with the results, and knew it was the perfect addition to our nature-themed gathering. We couldn’t wait to welcome all our party guests through our fabulous evergreen door.

A Fresh Coat of Paint to Kick-Start Your Fall

Here are three trips to getting you painting your front door for a fun weekend DIY project!

  1. Start out with Waverly ® Inspirations Super Premium Semi-Gloss Acrylic Paints. We used the rich and vibrant evergreen paint for our front door!
  2. No prime needed! We used 2 coats of the Waverly ® Inspirations Paints to get a streak-free and beautiful finish that will stand up to any wear-and-tear.
  3. Accessorize! We created this fabulous fall-inspired wreath to accent our freshly painted door. Check out the step-by-step process with Waverly.
A Fresh Coat of Paint to Kick-Start Your Fall

When we began to dream up the details for the perfect party, we knew we had to work with lifestyle and entertainment expert Annette Joseph. With over 20 years experience styling, cooking, and entertaining for some of the best magazines and websites around, we had no doubt that Annette’s expertise would bring our party to a whole new level. With Annette by our side, we had a blast brainstorming creative ways to bring our nature theme to life.

A Fresh Coat of Paint to Kick-Start Your Fall

It was so much fun to have our party theme and decor be inspired by an amazing color scheme. We can’t wait to show you the rest of our nature-inspired party -with Waverly Inspirations super premium semi gloss acrylic paints in our toolkit, it truly was a breeze! And don’t worry, there’s no need to be green with envy, we’ll be sharing all our tips, tricks, and DIY techniques so that you can achieve a colorful party all your own!

Cardboard Class with Estefi Machado

Oct 13, 2016

Cardboard Arcade: DIY Pac Man Game

If you’ve been reading Handmade Charlotte for a few years, then you’re already familiar with crafter extraordinaire Estefi Machado. She’s the mastermind behind some brilliant DIY projects, including this DIY Lego pencil holder and many others! Estefi is a designer / blogger / illustrator / crafter / photographer / mother living in Brazil. We love the kid-friendly DIY projects she shares on her blog – they’re all so much fun!

In the past few months, Estefi has been sharing some out-of-this-world DIY projects using cardboard as the main material. They’re so unique and creative that we just had to share a few of our favorites with you!

Cardboard Arcade: DIY Pac Man Game

Cardboard Arcade: DIY Pac Man Game

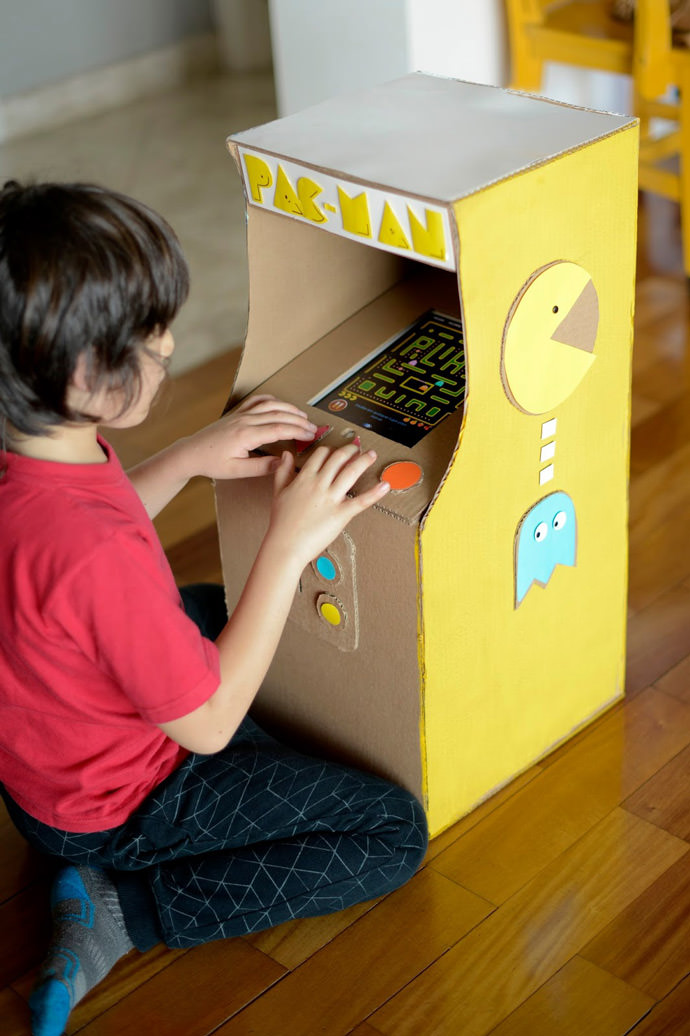
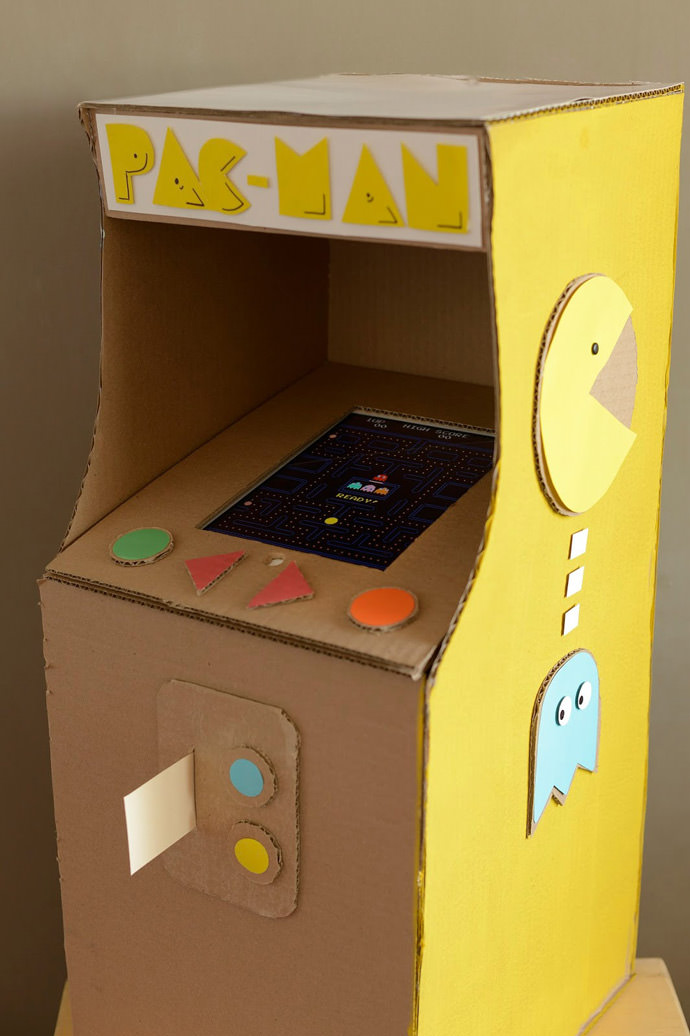
Possibly our all-time favorite of the bunch this is DIY Pac Man arcade game. If you take a closer look, you’ll notice that there’s an iPad built in to the structure! Is there a better way to introduce your kids to the classic video games of the 1980s? As Estefi writes on her blog, although this project is a bit time consuming, the materials and process are simple. She shares photos of her process and shows how to construct the game, including the handy spot to put your iPad.

Cardboard Arcade: DIY Pac Man Game Cardboard Arcade: DIY Pac Man Game

Shoebox Camper

DIY Shoebox Camper

We’ve said it before and we’ll say it again: we love craft projects that recycle everyday objects! Estefi turned an empty shoebox into this adorable DIY camper van, decorating it with patterned paper, round lids, and paper straws. Did you notice the miniature plant in a thimble? It doesn’t get much cuter than that, folks! See more photos of her process right here.

DIY Shoebox Camper DIY Shoebox Fairy Cottage

Similar to the camper van, Estefi shared a DIY fairy cottage also using a cardboard box as the main structure, and adding cardboard and accessories for furnishings.

DIY Shoebox Fairy Cottage

Cardboard Boom Box

DIY Cardboard Boom Box

The music lover in your life is sure to be a fan of this project: a handmade cardboard boom box! Using an iPhone and a compatible music player as the base, Estefi shows how to cut and assemble your own retro boom box. And an added bonus: this boom box is super light, so if you plan on holding this guy over your head to apologize to anyone, it should be a breeze.

Cardboard TV

DIY Cardboard TV

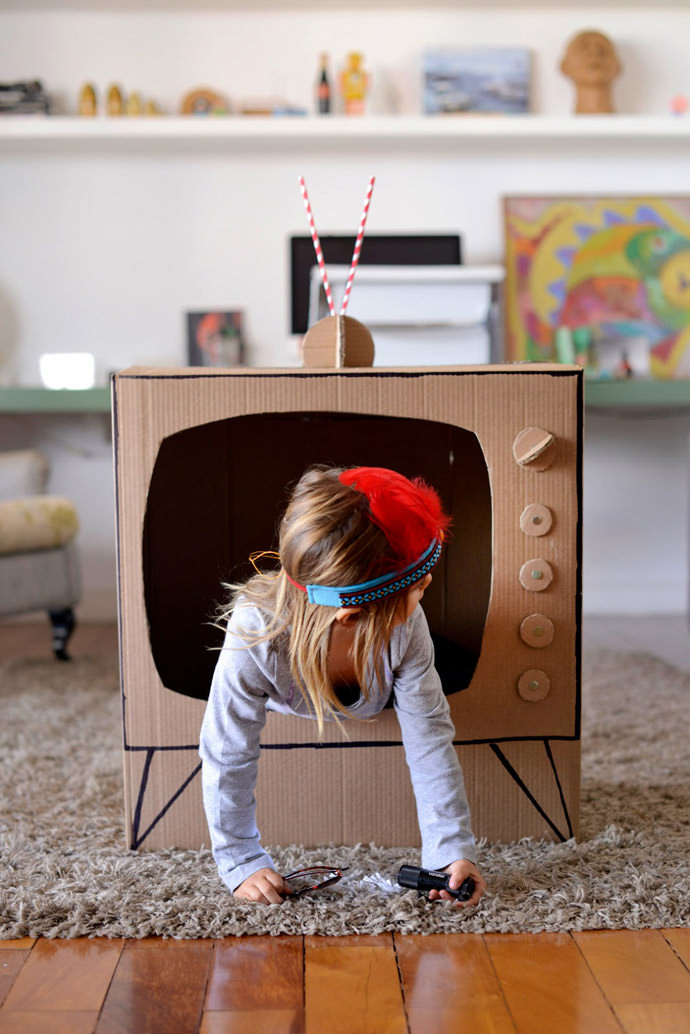
Looking to cut down on screen time? Make your own cardboard TV instead! Any large, strong box is a great base, and then cut and draw details to make it look even more like a TV set. Estefi even attached circular knobs with brads so that they can spin!

DIY Cardboard TV DIY Cardboard TV

Cardboard Super 8 Camera

DIY Cardboard Super 8 Camera DIY Cardboard Super 8 Camera

And another oldie but a goodie: a cardboard Super 8 camera! Estefi had a real Super 8 camera to reference when she built her cardboard version, but a quick image search will provide all the details you need. Wouldn’t this a great way to introduce film and camera history to kids?

We could go on and on for days about Estefi’s amazing creations, but we’ll leave you to discover the rest for yourself! Be sure to follow her cardboard adventure on her blog and Instagram!
James and the Giant Peach Costume

DIY James and the Giant Peach Costume

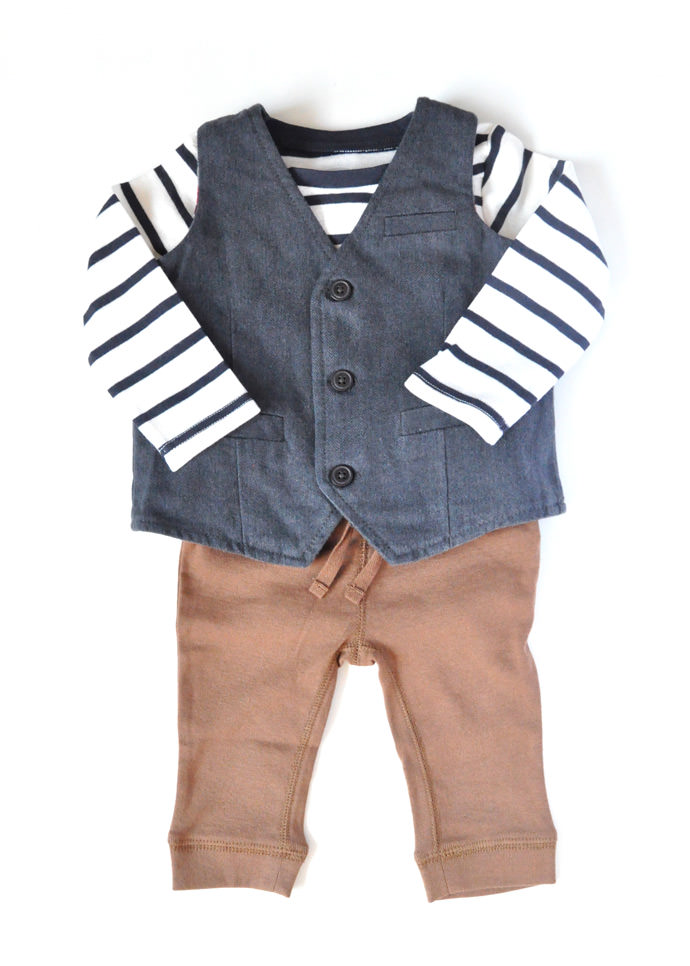
If you’re looking for a simple and low-key Halloween costume for your baby or toddler this year, this James and the Giant Peach costume is just the thing! Since the main feature of the costume is the giant peach balloon, your little James will be as comfy and mobile as can be in regular clothing.

DIY James and the Giant Peach Costume

We put our little James in a cute vest over a neutral onesie and pants as a nod to the Disney adaptation of the book. Isn’t he the cutest? If you’ll be out and about this Halloween, fill your giant peach with helium and carry it around with you. Or if you’ll be sticking around the house, just blow the balloon up with regular air and let the peach bounce around your house with James. :)

DIY James and the Giant Peach Costume

What You Need

DIY James and the Giant Peach Costume

  • Green and brown cardstock
  • Scissors
  • Tape (clear and pink washi tape)
  • Paint
  • Paintbrush, sponge, or plastic bag
  • Giant orange balloon (ours was 16”)
  • Baby/toddler James outfit (we were inspired by the image here and this one as well)

How-To

DIY James and the Giant Peach Costume

Step 1
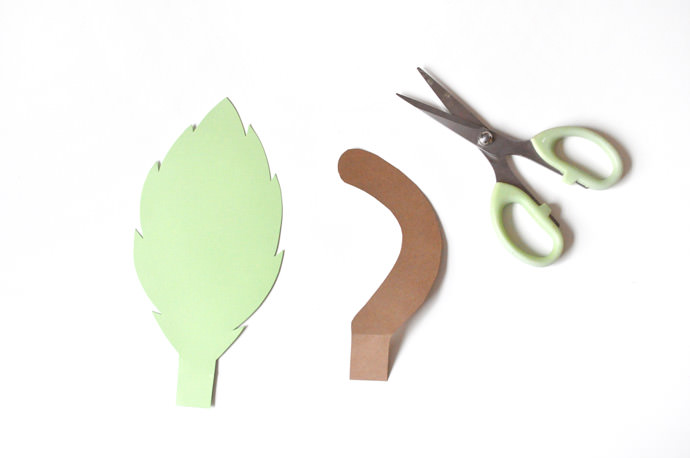
Cut a peach stem out of brown cardstock and a leaf out of green cardstock, leaving a 1” tab on the end (to tape onto the balloon later).

DIY James and the Giant Peach Costume

Step 2
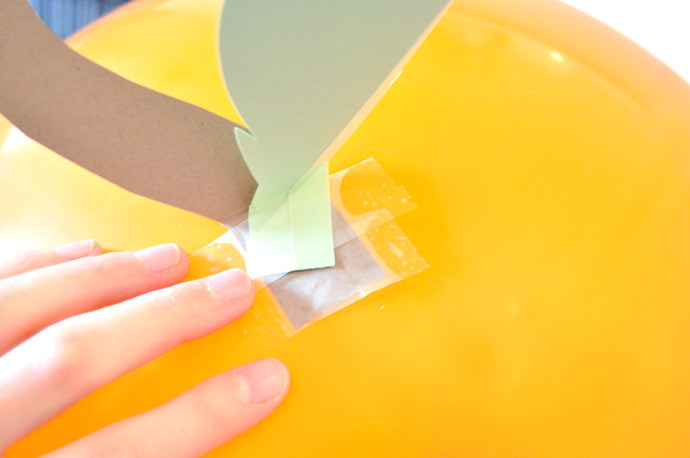
Inflate your giant orange balloon. Fold the tabs on the stem and leaf (we also creased the leaf in half) and then tape onto the top of the balloon.

DIY James and the Giant Peach Costume

Step 3
Use red, yellow, pink, and white paint to apply a splotchy spatter onto the balloon to make it look more like a peach. It helps to try this on an extra balloon or scrap paper first to test your technique. I ended up using a crumpled up plastic bag to get the look I liked.

DIY James and the Giant Peach Costume

Step 4
Apply a piece of pink washi tape starting at the stem and going about halfway down the front of the balloon to imitate a peach’s dimple. I used scissors to cut the ends into points for a more natural look.

DIY James and the Giant Peach Costume

Now dress up James, give him his giant peach and you’re all set!

DIY James and the Giant Peach Costume

DIY James and the Giant Peach Costume

DIY James and the Giant Peach Costume

Happy Halloween!!

 
Copyright © -2012 Colection hand made All Rights Reserved | Template Design by Favorite Blogger Templates | Blogger Tips and Tricks