Printable Rainbow Color Matching Cards

Mar 21, 2017

Printable Rainbow Color Matching Cards

If you ask me my favorite color, I’ll tell you it’s rainbow. Putting things in color order makes me so happy! And that’s what these printable color matching cards are all about. Well, that and learning the words for the colors in the rainbow!

Montessori classrooms use cards like this to help children connect words with the things those words represent. And they aren’t only for kids who are already reading! In this case, the cards teach colors and give you the chance to help little ones learn all about ROYGBIV.

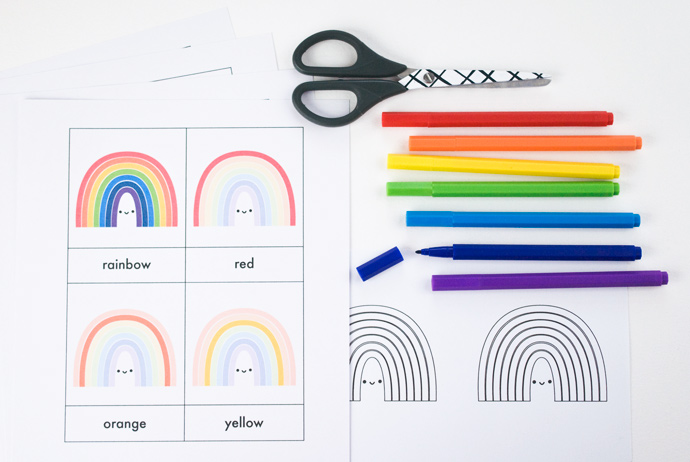
What You Need
Printable Rainbow Color Matching Cards
  • Card stock and/or paper
  • Scissors
  • Crayons or markers
  • Rainbow Color Matching Cards templates (download here)
  • Rainbow Coloring Cards templates (download here)

How-To
Printable Rainbow Color Matching Cards Printable Rainbow Color Matching Cards

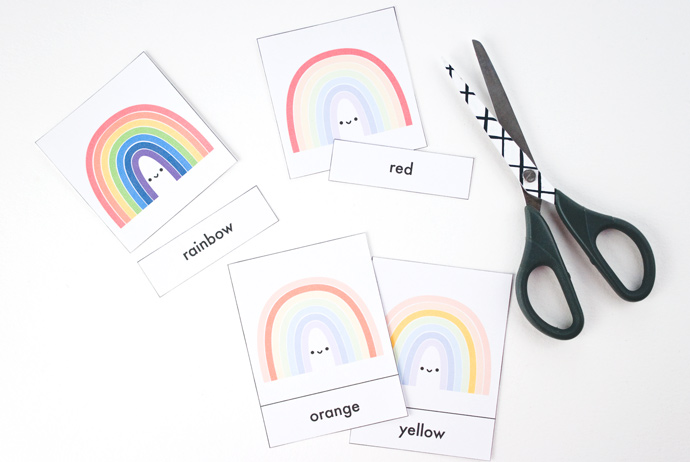
Print the pages from the color matching PDF onto card stock.

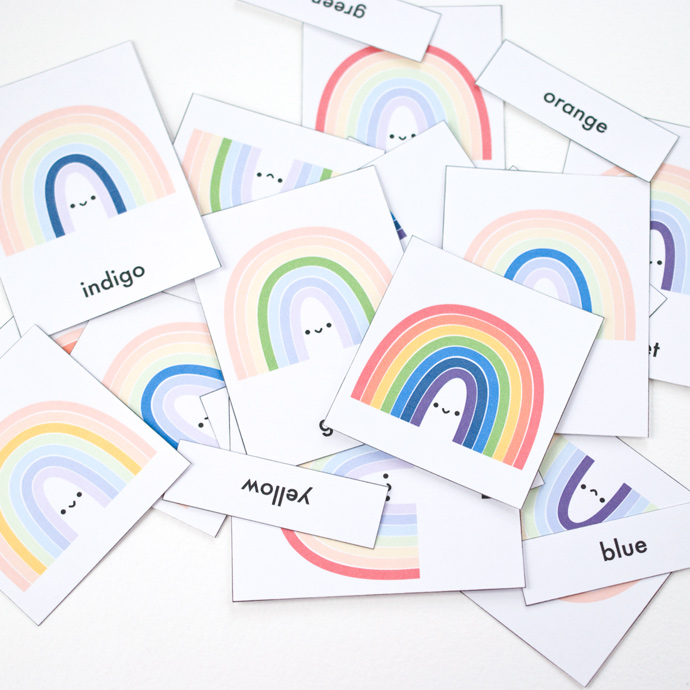
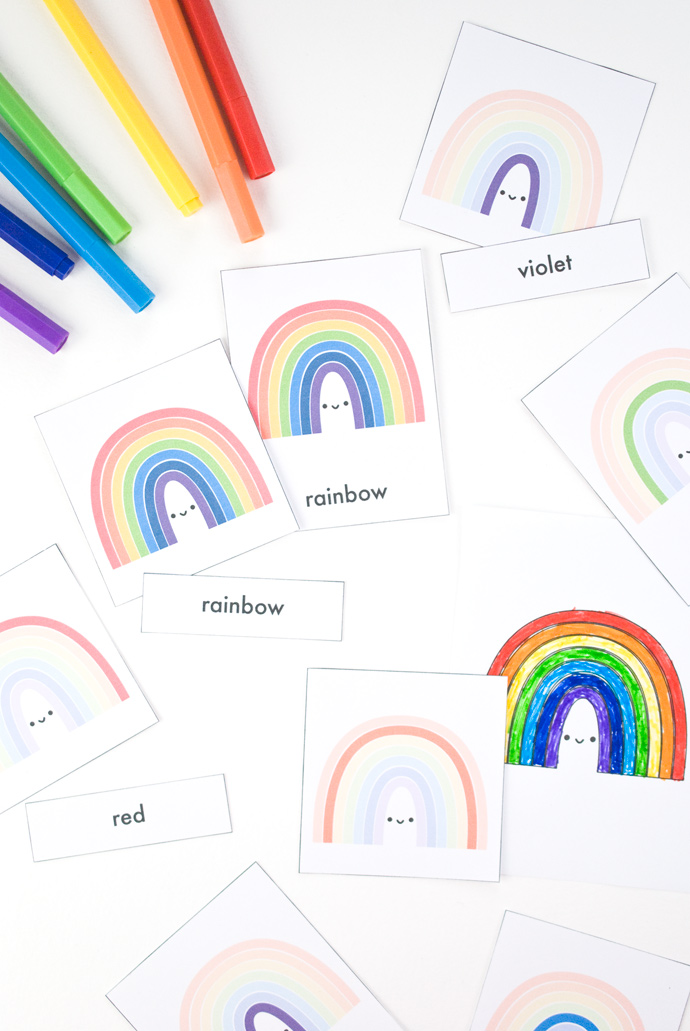
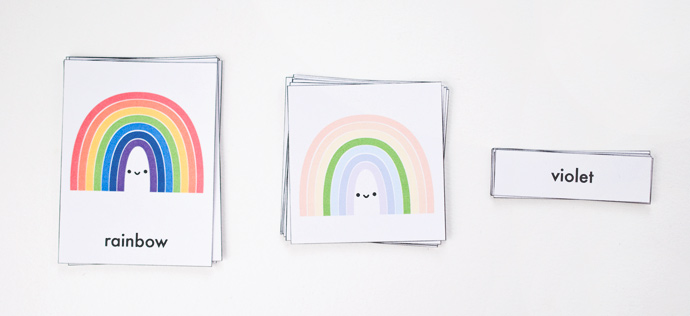
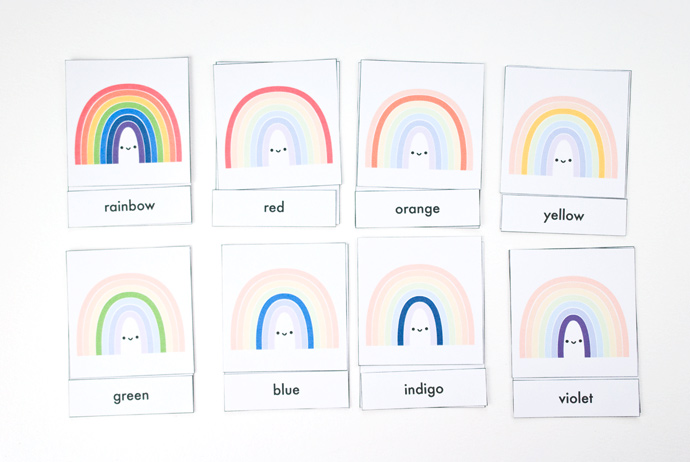
There are three parts to each of the matching sets. For each color of the rainbow there is a card with the picture and the word, a card with only the picture, and one with only the word. Cut all the cards apart.
Printable Rainbow Color Matching Cards

Divide the cards into three piles with the cards mixed.

Now there are a several ways to use these cards, but the basic idea is to match pictures and words.
Printable Rainbow Color Matching Cards

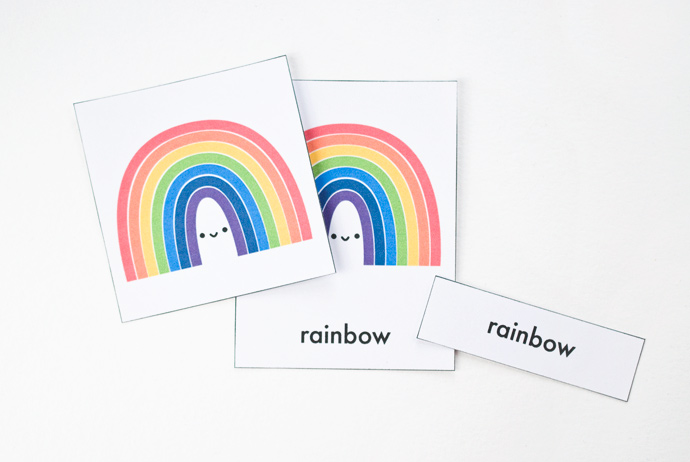
When Montessori classrooms use cards like this, students start with the most complete card. In this case, it would be the full rainbow.

Have your child find the full rainbow card with the picture and the word. Next, have them find the card with only the picture of the rainbow and place it on top of the first card. Finally it’s time to find the card with only the word ‘rainbow’.
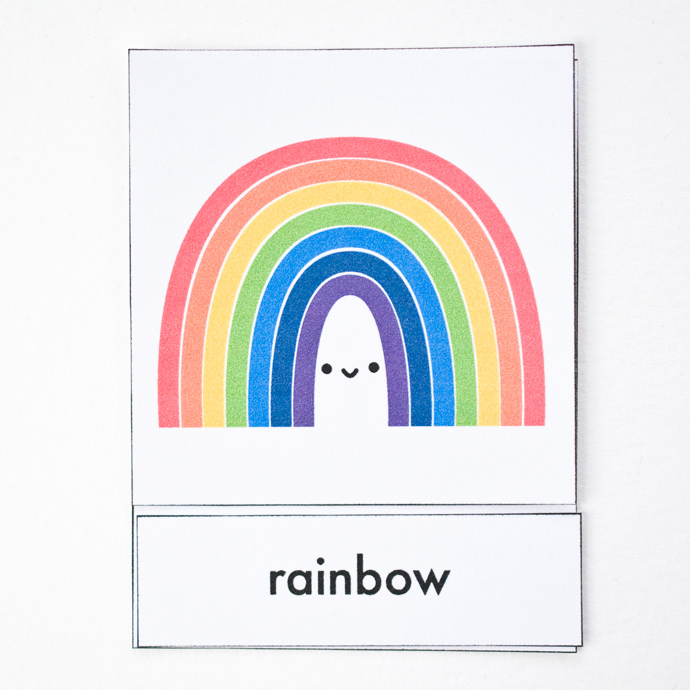
Printable Rainbow Color Matching Cards

Even if your child can’t read yet, they can learn how to look for the words that match. This process will help them connect the words with the pictures and start to gain sight words!

Continue working through all the cards, matching the colors, pictures, and words.
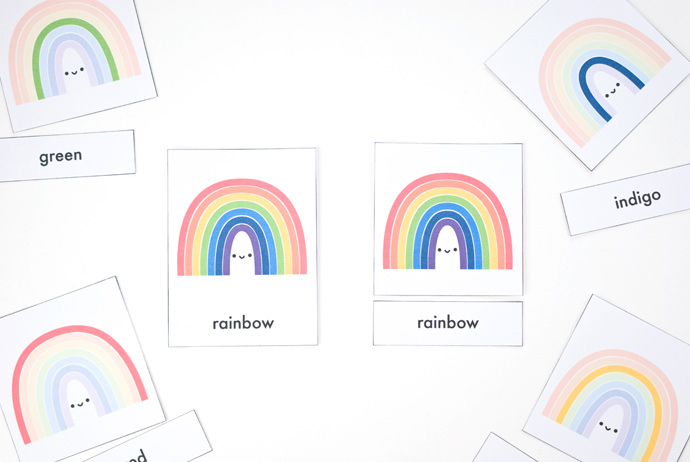
Printable Rainbow Color Matching Cards

The cards with the words and pictures act as a way to make matches, while ensuring that the answers are correct. But as your child is better at reading the words and making matches, you can set the largest cards aside.

If you want to encourage learning the ROYGBIV color order, you can ask your child to place the cards in order. Do this either as they are matching the cards or after they are finished.
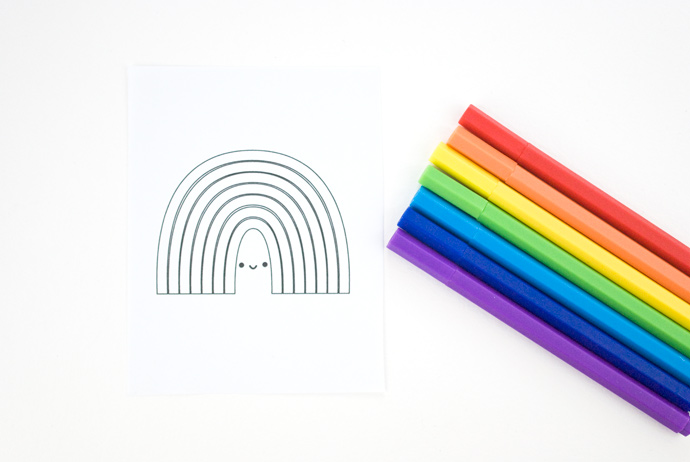
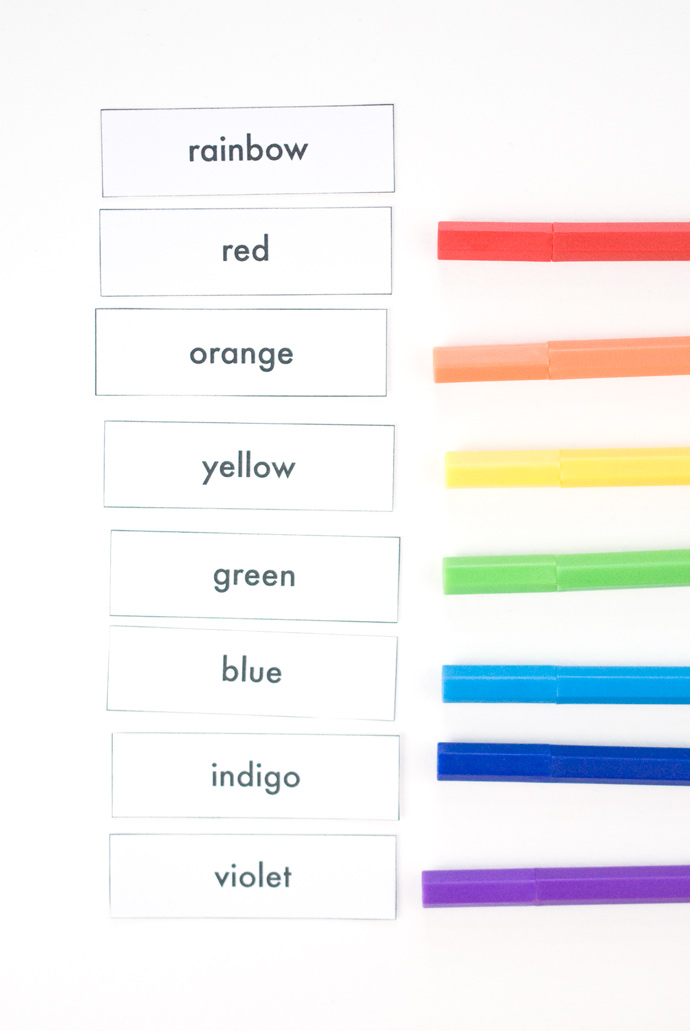
Printable Rainbow Color Matching Cards Printable Rainbow Color Matching Cards

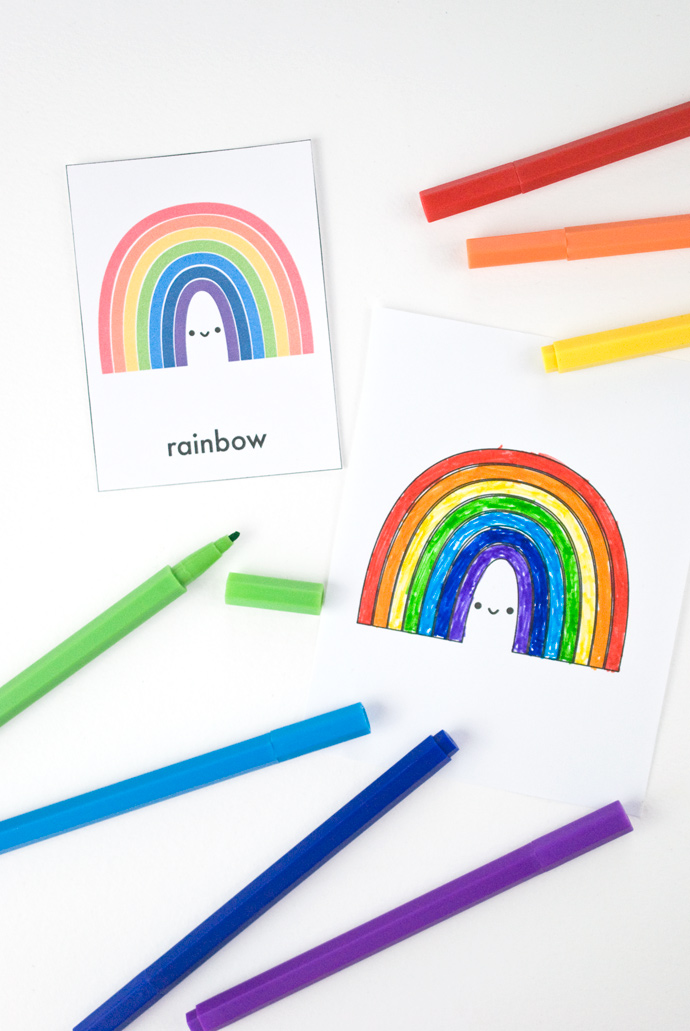
You can extend this activity with the Rainbow Coloring Cards PDF. Print out a page (or two) of blank rainbows and grab some ROYGBIV crayons or markers.

Have your child start by matching the cards to the colors.
Printable Rainbow Color Matching Cards

Now they can color their own rainbows! For even more color and word practice, invite them to color a set of cards like the printed set. For each card, they can color one stripe of the rainbow and then write the color word underneath.
Printable Rainbow Color Matching Cards

Because these cards work in different ways, this is an activity that you’ll want to pull out from time to time. As your child learns and grows, they will experience the rainbow in new ways!

Happy color matching!

Rainbow Balloon Cake Topper

DIY Rainbow Balloon Cake Topper

It’s almost time for leprechauns, April showers, and rainbow season!  I don’t know about you, but I have some serious Spring fever.  Spring and fall are probably my favorite times of the year for entertaining, so let the festivities begin!

DIY Rainbow Balloon Cake Topper

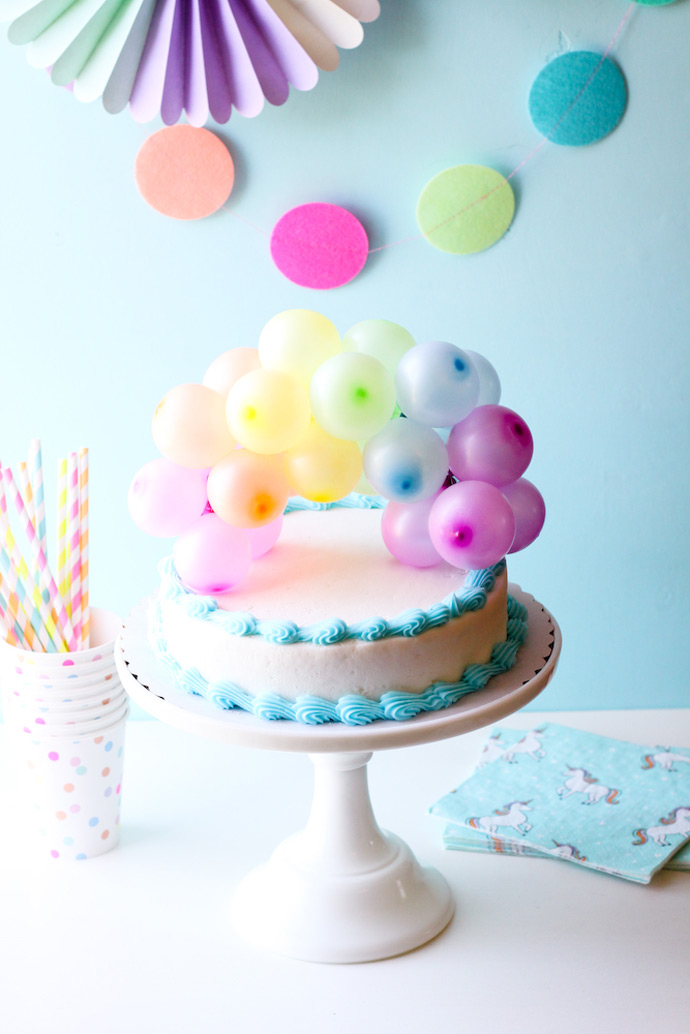
You have probably seen balloon arches before, and even rainbow cake ideas…but have you ever combined the two into one adorable cake topper?  It is such a fun little DIY, and only requires five supplies, including the cake!  You know what Julia Child says.. ”a party without cake is just a meeting.”  Well, a cake without a cake topper is like a unicorn without a horn!  We can’t have that.

DIY Rainbow Balloon Cake Topper

Let’s whip those balloons into some rainbows, shall we?

DIY Rainbow Balloon Cake Topper

What You Need

DIY Rainbow Balloon Cake Topper
  • Water balloons in pink, orange, yellow, green, blue and purple
  • Balloon Pump
  • Craft wire
  • Scissors
  • 8” round cake (or larger)

How-To

DIY Rainbow Balloon Cake Topper

Step 1
Using a balloon pump, blow up 4 balloons of each color.  They should be about the size of a small kiwi. It’s easiest to start large and let air out to get them down to the right size.  The balloon above is pictured with an egg, for size reference.

DIY Rainbow Balloon Cake Topper

Step 2
Cut a 30-inch piece of wire, and tie a pink balloon around it, leaving at least 6 inches of space between the balloon and the end of the wire.

DIY Rainbow Balloon Cake Topper

Tie a second pink balloon around the wire, and slide it so that the two balloons are close together, and touching.

DIY Rainbow Balloon Cake Topper DIY Rainbow Balloon Cake Topper

Continue tying balloons around the wire, until there are four pink balloons all squished together.

DIY Rainbow Balloon Cake Topper

Step 3
Now begin tying on four orange balloons, and slide them down to touch the row of pink.  Squish them all together as much as possible so that the wire and balloon ends are not showing through.

DIY Rainbow Balloon Cake Topper

Step 4
Repeat this process with four yellow, then green, blue and purple balloons.

DIY Rainbow Balloon Cake Topper

Slide the balloons around the wire until they are arranged in such a way that the wire and ends are showing through as little as possible.

DIY Rainbow Balloon Cake Topper

Step 5
Hold the wire on each side at the ends of the balloons, and pull the ends together to form an arch.

DIY Rainbow Balloon Cake Topper

Step 6
Estimate the height of your cake, and using scissors, cut the wire down on each side, leaving at least two inches of wire to stick through the top of the cake.  Use soap and water to wash the two wire ends and any balloons that may touch the cake.  Don’t forget to rinse and dry!

DIY Rainbow Balloon Cake Topper

Step 7
Hold the balloon arch over the middle of your cake, and stick the wire in on each side.

DIY Rainbow Balloon Cake Topper DIY Rainbow Balloon Cake Topper DIY Rainbow Balloon Cake Topper

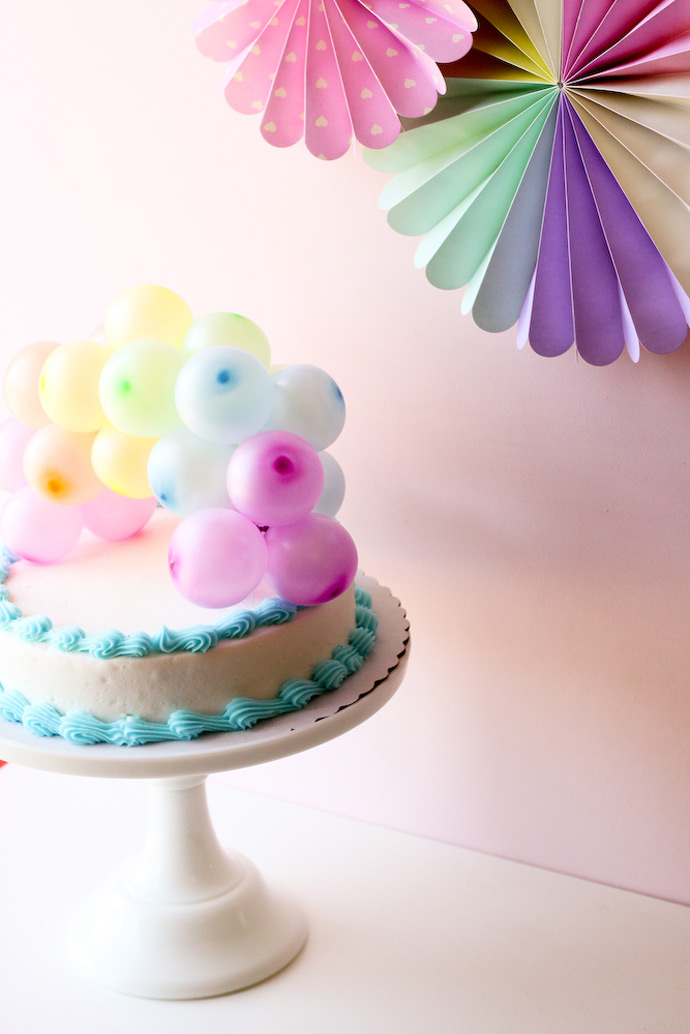
Voila!  You have an adorable rainbow balloon arch cake topper. Enjoy!

Happy Spring Paper Watches

DIY Greeting Card Watches for Spring

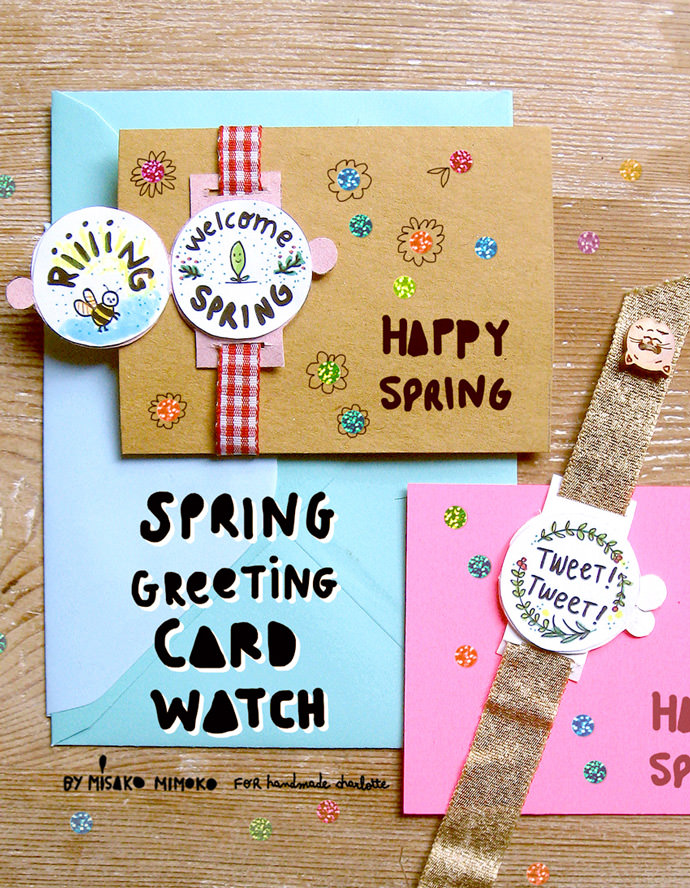
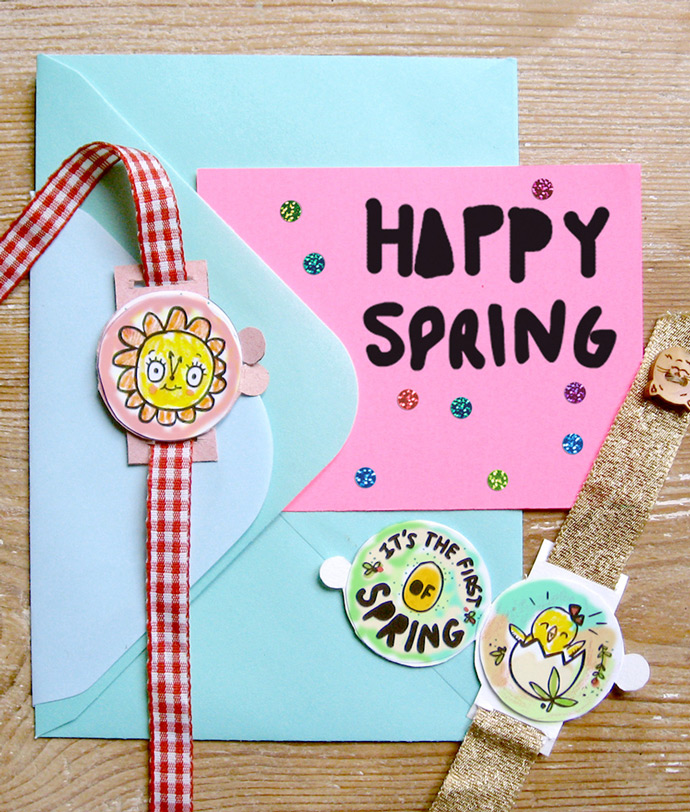
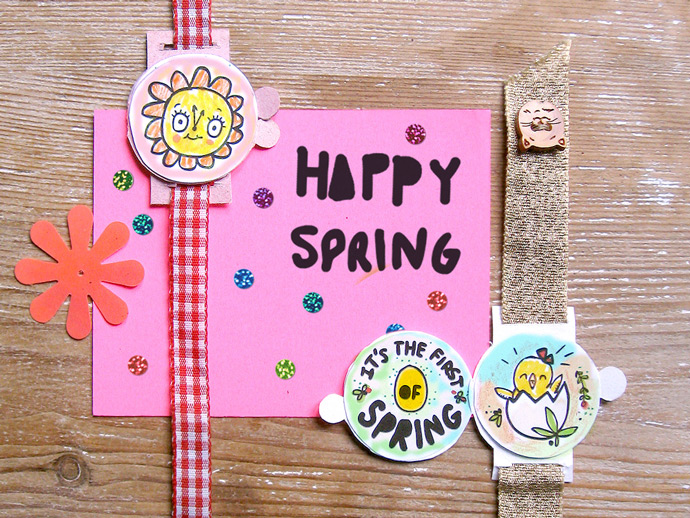
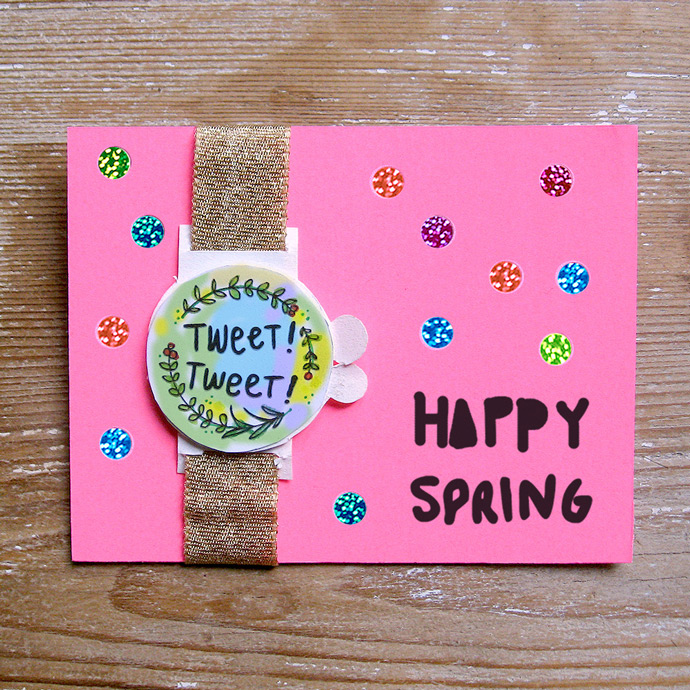
Now that our clocks have sprung forward, why not celebrate the longer brighter days with these fun DIY watches? Craft, draw, and color these adorable paper watches and greeting cards for the perfect handmade Easter presents! Choose your favorite design from the free printables below and have fun coloring them in with your kids this spring.

DIY Greeting Card Watches for Spring

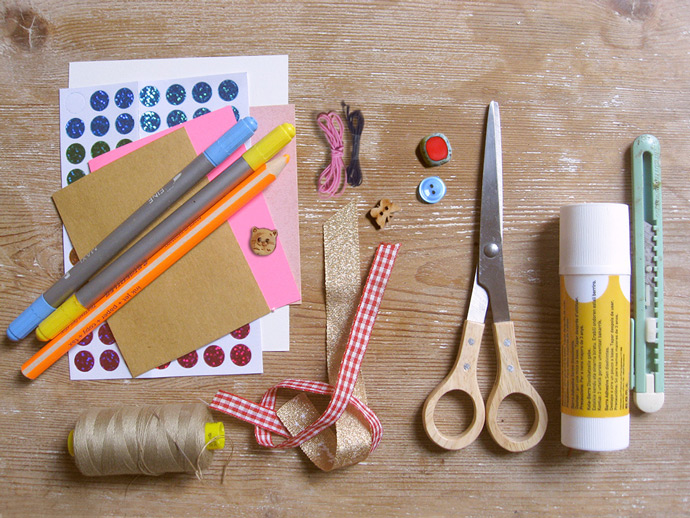
Gather up some buttons and ribbon, print out the provided template and let’s get crafting! Oh, and P.S: these cute handmade watchbands can be used on real watches, too! Keep reading to see more.
What You Need

DIY Greeting Card Watches for Spring
  • Printable templates (download here)
  • Ribbon and trims
  • Buttons
  • Elastic cord
  • Cardstock
  • Scissors
  • Craft knife
  • Glue
  • Needle
  • Thread
  • Paint and/or markers
  • Round stickers (optional)

How-To

DIY Greeting Card Watches for Spring

Step 1
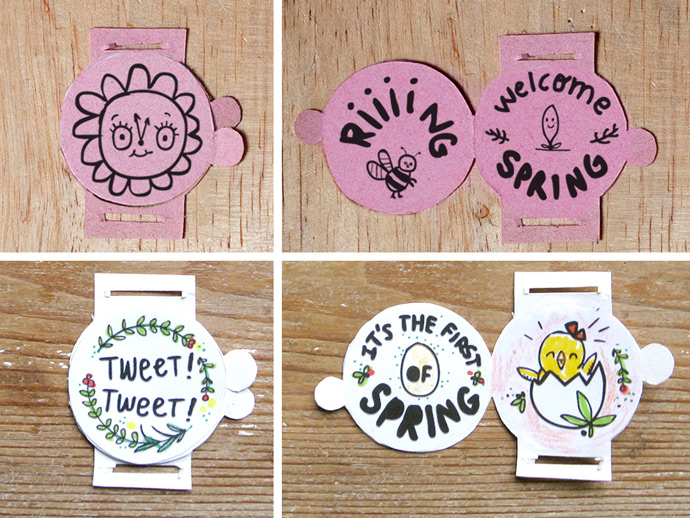
Download and print the templates onto plain or colored cardstock. Cut out the watches and greeting circle shapes. Fold the watch in half so that the interlocking tabs (the small circles on the sides) meet and lock together. Take extra care when cutting and folding to ensure a good fit. Use a craft knife to cut out the slots, following the marks on the template. Now, color in the printed greeting circles.

DIY Greeting Card Watches for Spring

Step 2
Glue your colored greeting circles onto a blank paper watch. Glue one to the front and the two into the inside.

DIY Greeting Card Watches for Spring

Step 3
You can also choose to draw your own designs onto blank watch templates. Have fun with it and mix it up!

DIY Greeting Card Watches for Spring

Step 4
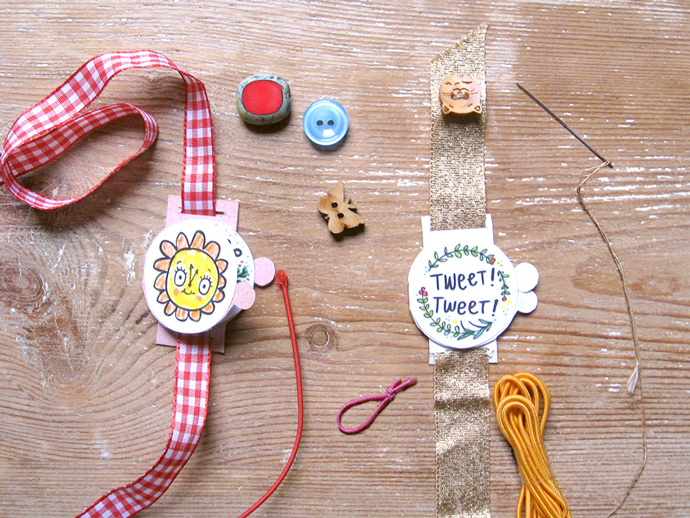
To make the watch band, cut a piece of ribbon, leaving a 1/2 inch seam allowance on the ends. Thread the ribbon through the paper watch slots. Choose your favorite button and stitch it onto one end of the ribbon with a needle and thread. Cut a piece of elastic cord about 2 1/2” – 3” long and tie an overhand knot, forming a loop.

DIY Greeting Card Watches for Spring

Step 5
Thread the other end of the ribbon (the one without the button) through the elastic cord loop. Fold the ribbon end (hiding the elastic loop knot in the process) and stitch a seam to hold it in place. Add a few stitches to the elastic cord to keep the knot inside the ribbon seam too.

DIY Greeting Card Watches for Spring

Step 6
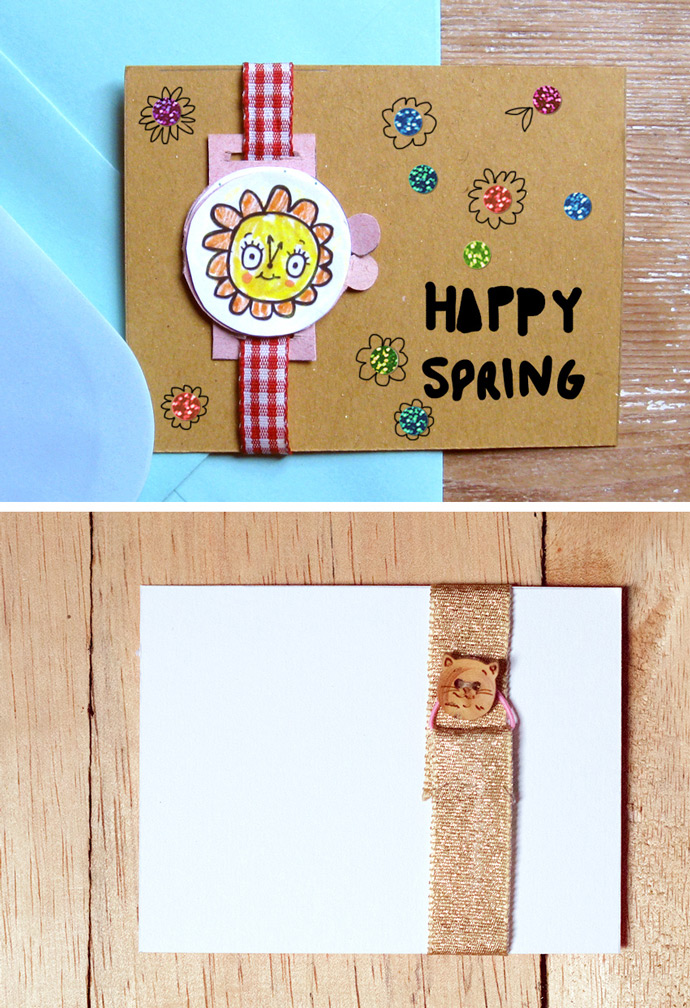
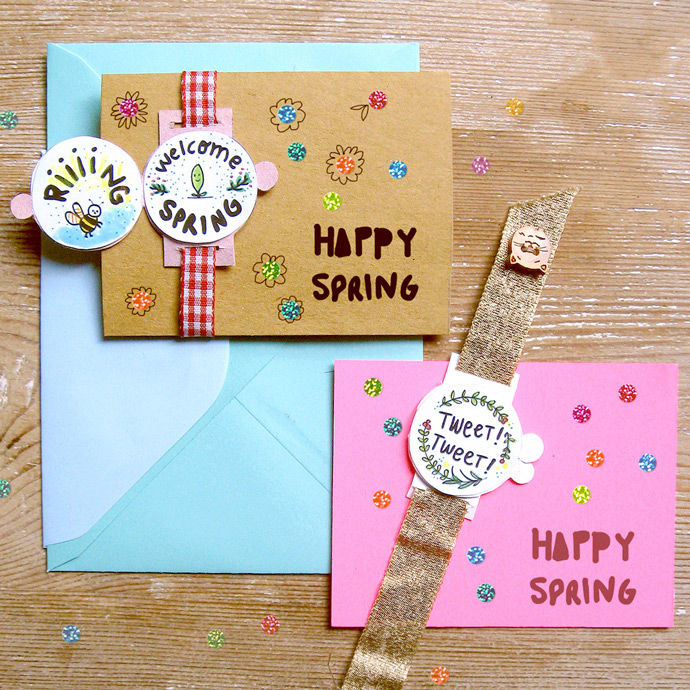
Download and print the Happy Spring cards onto cardstock, or write your own message on a blank card. Decorate the cards with stickers, glitter, drawings, whatever you like! Cut it out and secure the watches around the card.

DIY Greeting Card Watches for Spring

Choose a matching envelope and voila!

DIY Greeting Card Watches for Spring

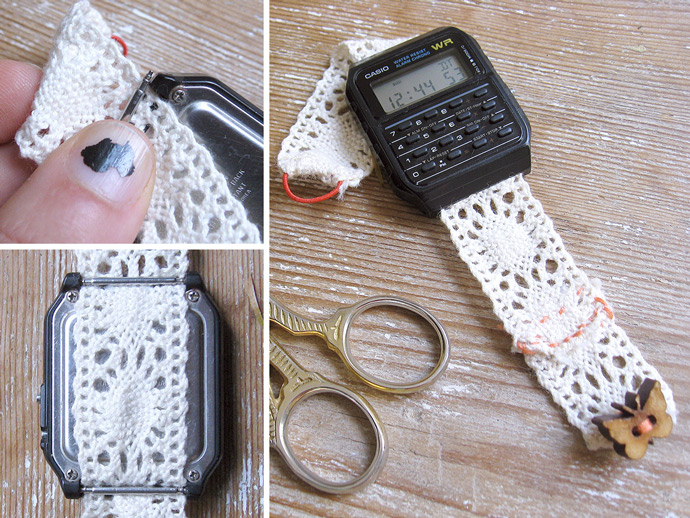
And one last tip! Follow the steps to make your own watch band to replace an old broken one of a real watch. Cool, right?

DIY Greeting Card Watches for Spring DIY Greeting Card Watches for Spring

Happy spring!
Rainbow Cloud Place Settings for St. Patrick’s Day

Mar 5, 2017

DIY St. Patrick

Are you Irish? Although I don’t have any Irish in my blood, I just LOVE St. Patrick’s Day! I guess I’m just obsessed with lucky charms, rainbows, and pinching people who don’t wear green! I also love anything “cloud”, so this year I decided to make some no-sew cloud utensil pockets with pom-pom rainbows for our St. Patrick’s celebration. It has been an extra cloudy winter here, so I figured I would embrace the weather and find a way to celebrate!

DIY St. Patrick

These could also be used for any party involving rainbows…Rainbow Brite, My Little Pony, just plain rainbows, etc.  They are such a cute addition to your table setting, and every March 17th, you can bring them out again!

DIY St. Patrick

Although I used them as utensil pockets, they could also hold favors, gold chocolate coins, or even leprechaun bait!

DIY St. Patrick

What You Need

DIY St. Patrick
  • White felt (8.5×11”)
  • Cardstock (8.5×11”)
  • Assorted pom-poms (9 per cloud)
  • Small beads (3 per cloud)
  • Fishing line
  • False eye lashes (1 set per cloud)
  • Blush
  • All-purpose tacky glue
  • Scissors
  • Permanent marker
  • Sewing needle

How-To

DIY St. Patrick

Step 1
Fold a piece of 8.5×11” cardstock in half, and draw a cloud shape, or find a cloud online and print off a template.

DIY St. Patrick

Step 2
Fold your 8.5×11” piece of felt in half, and trace your cloud template on one side, using a permanent marker.  With the piece of felt still folded in half, cut right inside the lines to cut out your cloud.  Now you should have two felt clouds.

DIY St. Patrick

Step 3
Using a needle and fishing line, thread 3 pom-poms in different sizes and colors onto the line.  Spread them out with a couple of inches in between each pom-pom.

DIY St. Patrick

Step 4
Tie one end of the fishing line around the bottom pom-pom.  Cut the fishing line off the spool about 2-3 inches above the top pom-pom.  Thread a bead on the top end of fishing line, and make several knots around the bead, leaving a couple inches between the bead and pom-pom.

DIY St. Patrick

Step 5
Repeat step 4 two more times, so that you have 3 strands of pom-poms, with a single bead at the top of each strand.

DIY St. Patrick

Step 6
Squeeze a line of glue onto one felt cloud about ½” from the edges, but leave a good portion of the top of the cloud un-glued.

DIY St. Patrick DIY St. Patrick

Step 7
Lay the beads from your pom-pom strands over the glue at the bottom of the cloud, and place your second felt cloud directly over the first cloud.  Push the clouds together all the way around the glued edges, and squeeze them together until they begin to dry.

DIY St. Patrick

Step 8
Place a pair of false eyelashes on top of the cloud, and move them around until you are satisfied with their placement.  The kind I used were sticky enough to stay on their own, but you may need to add a tiny strip of glue to the lashes.

DIY St. Patrick

Step 9
Use a blush brush to apply a small circle of blush to the “cheeks” of your cloud.

DIY St. Patrick

Once your cloud is dry, you may add utensils, napkins, straws, or even favors!

Happy crafting!

DIY Winter Woods Embroidered Pullover

DIY Winter Woods Embroidered Pullover

Update your plain and boring pullover with pompoms and cute embroidered trees to create a winter-inspired scene! This DIY is a really easy way to customize a sweater by adding a touch of embroidery – it doesn’t take much to add a lot of cozy charm. :)

DIY Winter Woods Embroidered Pullover

Grab any basic sweater (you’ll find that the simplicity of the piece makes it the perfect blank canvas) and use yarn to create bold embroidery without many stitches. Get kids involved in the craft process by letting them create the forest layout and choose their own colors! It’ll be lots of fun, promise! Plus, You’ll be surprised how fast and fun this yarn embroidery technique is – you’ll be finished before you know it. Let’s get started!

DIY Winter Woods Embroidered Pullover

What You Need

DIY Winter Woods Embroidered Pullover
  • Printable templates (download here)
  • Plain sweater
  • White pompoms
  • Yarn
  • Needles (sewing and yarn)
  • White thread
  • Fabric marker
  • Scissors

How-To

DIY Winter Woods Embroidered Pullover

Step 1
Download and print out the templates. Transfer them onto the fabric by either eye-balling the template and drawing the trees onto the sweater with a fabric pen or cut out the trees from the paper to make a stencil you can trace onto the sweater.

DIY Winter Woods Embroidered Pullover

I’ve designed a big and a small tree pattern, but feel free to play around with the number of stitches to make your own variations. Big trees are stitched using a weaving stitch. First, we’ll stitch a group of vertical/diagonal stitches (straight stitches) to make a triangular shape, then we’ll weave long horizontal stitches through those. Small trees are simpler triangular shapes made of vertical/diagonal straight stitches that meet at the top of the triangle, without the weaving step.

DIY Winter Woods Embroidered Pullover

Step 2
Big tree:
Thread your yarn needle with a beautiful green yarn and tie a knot at the end. Start at the top of the triangle and sew your first stitch up through the sweater. Pull the needle all the way through until the knot is secure inside the sweater then start stitching. Follow the stitching sequence shown on the big tree template.

Hints:

  • Notice that stitches don’t meet at the exact same point at the top of the triangle, they’re just very close. If they all meet at one point, a hole can form and we don’t want a huge hole at the top of the tree!
  • From the front of the sweater, the stitches should look like long loops, with small stitches on the backside following the triangle shape.
  • The number of diagonal stitches and the space between each stitch depends on your preference – think of the provided template as a guide, but not the only way to make these trees. Play around with the size and density of stitches.
  • Be careful that stretchy sweaters don’t bunch up while stitching.
DIY Winter Woods Embroidered Pullover

Now it’s time to make the horizontal stitches starting at the bottom of the triangle. Weave your threaded needle across by going over one vertical thread, then under the next, repeating this all the way across. When you get to the end, pierce the needle into the fabric, bring it up again just above where you went in, and then weave again in the opposite direction but this time wherever you went under a thread the first time, go over instead, and vice-versa until you reach the other side. Keep repeating this until you get to the top of the triangle. Hide your yarn tail on the inside of your sweater by weaving it back and forth through the existing stitches.

DIY Winter Woods Embroidered Pullover

Step 3
Trunk: Make a large cross-stitch in brown/dark orange yarn to make each trunk. Tie a knot at the end your yarn and then stitch the large cross-stitch centered at the bottom of the embroidered tree. Follow the sequence marked on the trunk template and when the trunk is finished hide your yarn tail in the same way as before (on the inside of the sweater by weaving it back and forth through the stitches).

DIY Winter Woods Embroidered Pullover

Step 4
Small tree: Try using a different shade of green to make your winter forest more colorful! Thread bright green yarn onto the needle and tie a knot at the end. Start at the top of the triangle and sew your first stitch up through the sweater. Pull the needle all the way through until the knot is secure inside the sweater, then start stitching. Follow the stitching sequence marked on the small tree template. You can change the number of diagonal stitches to change the size/shape of the small trees.

DIY Winter Woods Embroidered Pullover

Step 5
Snowflakes: Once you’ve embroidered all the trees, it’s time to add some snow to your forest! Figure out where you want to place your snowflakes and mark each position onto your sweater using a fabric pen. You can stitch the pompoms on, or if you want a faster option gluing them on works too.

DIY Winter Woods Embroidered Pullover

To stitch the pompoms on, thread your sewing needle and tie a knot at the end. Begin stitching up through the sweater and pull the thread all the way through until the knot is secure. Take one pompom and push the needle up through the thick center of it (not the fluffy edge). Stitch down again through the center of the pompom, and then through the sweater.
Repeat this several times to ensure that the pompom is on tight. Tie the loose ends on the backside in a double knot – you can also apply a dab of glue onto the knots for extra security. Repeat until all of your pompoms are attached, adding as many pompoms as you like.

DIY Winter Woods Embroidered Pullover DIY Winter Woods Embroidered Pullover

Washing machine tips: Turn the sweater inside out, put into a pillowcase, and wash on the delicate cycle.

Happy crafting!

 
Copyright © -2012 Colection hand made All Rights Reserved | Template Design by Favorite Blogger Templates | Blogger Tips and Tricks