DIY Wooden Christmas Trees

Dec 31, 2016

DIY Wooden Christmas Trees

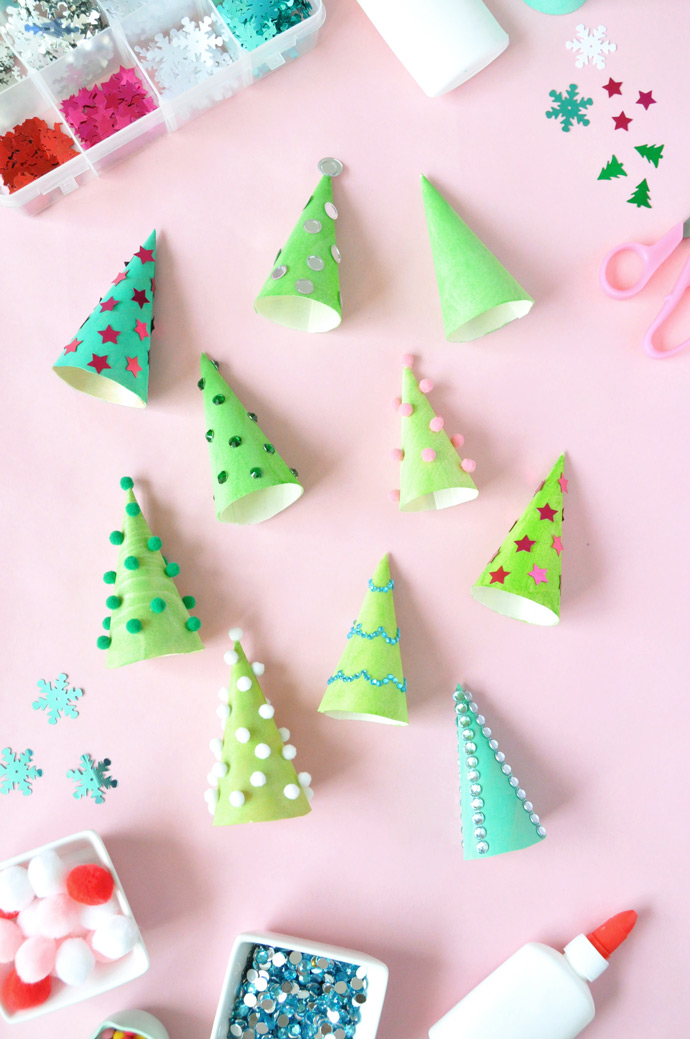
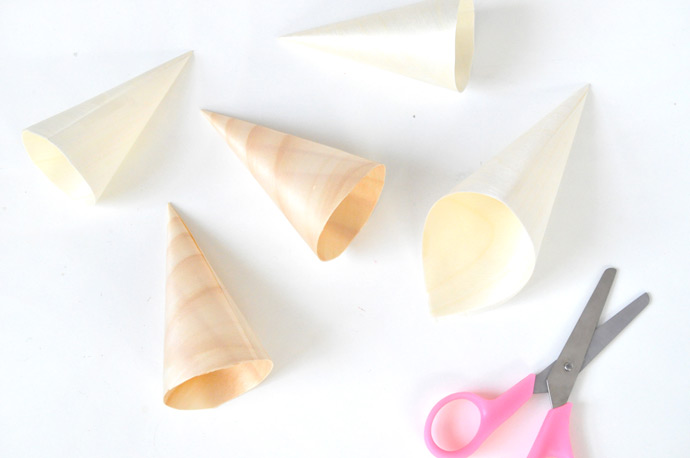
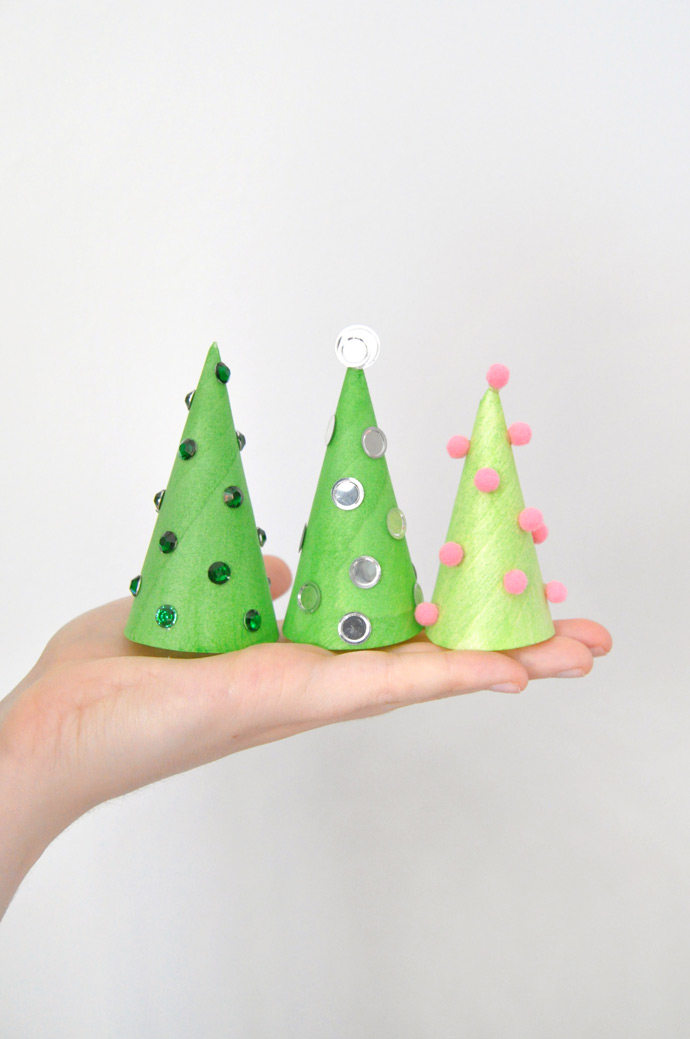
When I was browsing my local packaging supply store earlier this month, I stumbled upon these wooden serving cones. I knew right away that they’d be the perfect mini Christmas trees, so I scooped a bunch up for holiday decorations. I think I’ll use these to decorate our dining table on Christmas morning.

DIY Wooden Christmas Trees

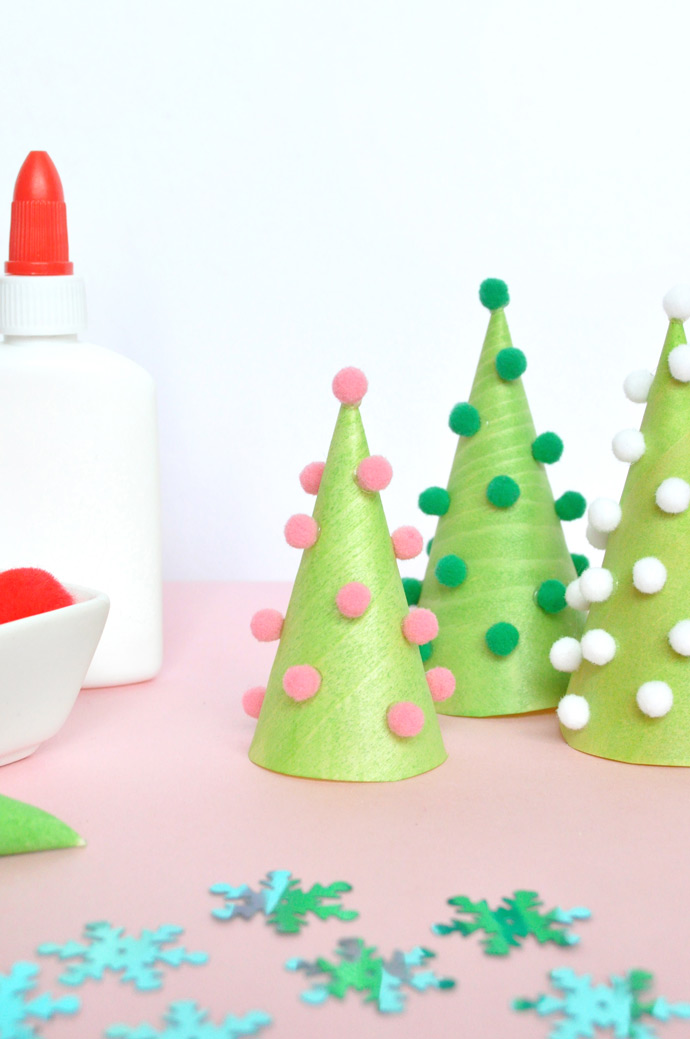
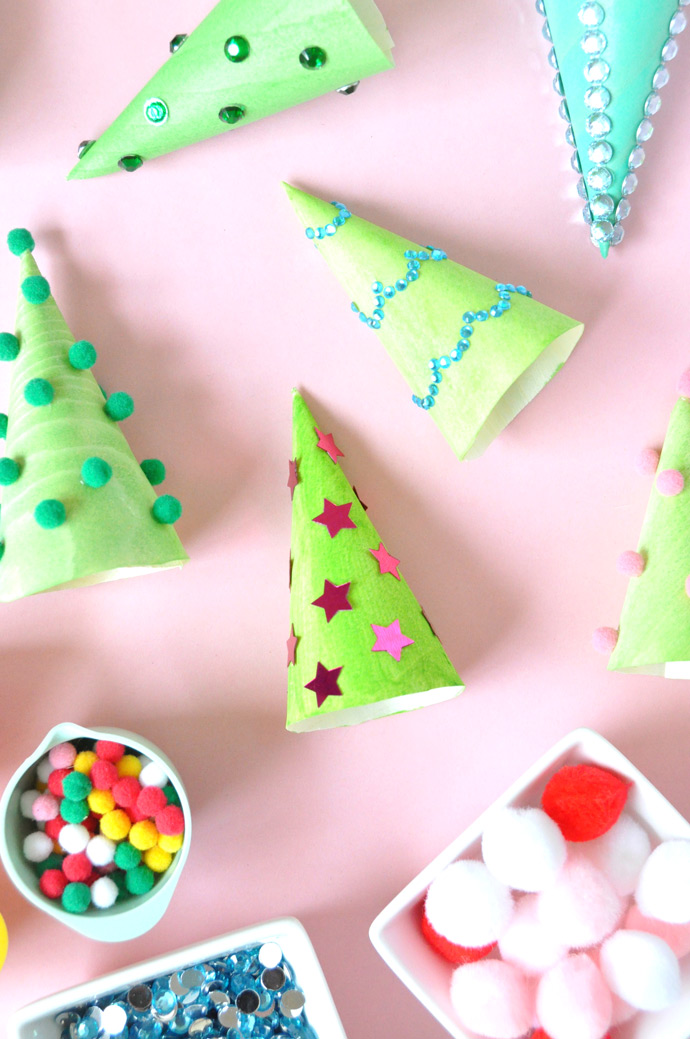
I love the subtle wood grain that shows through the paint and decorations. Look at your local craft store or packaging supply store for similar wooden cones – they’re super affordable. If you aren’t having any luck, you can replicate this idea by making simple paper cones instead. Either way, let’s get crafting!

DIY Wooden Christmas Trees

What You Need

DIY Wooden Christmas Trees
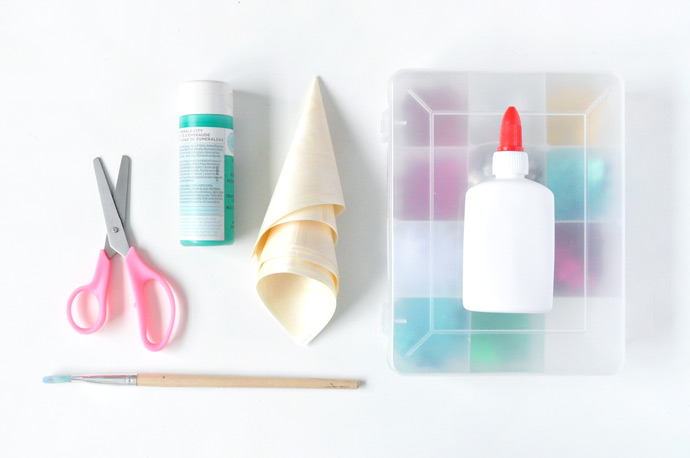
  • Wooden serving cones (like these)
  • Paint
  • Paintbrush
  • Pompoms, sequins, etc
  • Glue

How-To

DIY Wooden Christmas Trees

Step 1
Cut off the excess bit of wood on the cone so that they will sit flat on the table like a Christmas tree.

DIY Wooden Christmas Trees

Step 2
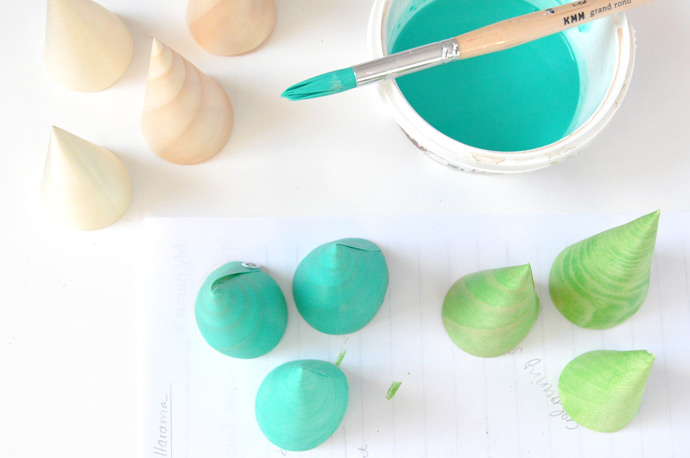
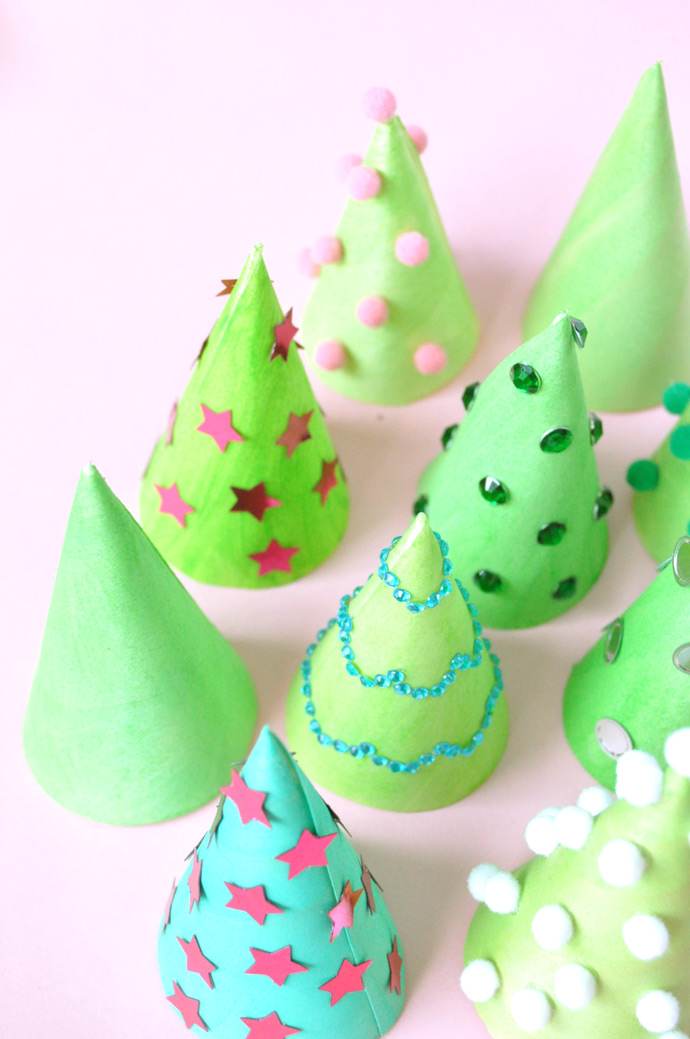
Paint the trees in shades of green. If you add water to the paint to dilute it, it will act more as a stain and the wood grain will remain visible. Let dry.

DIY Wooden Christmas Trees

Step 3
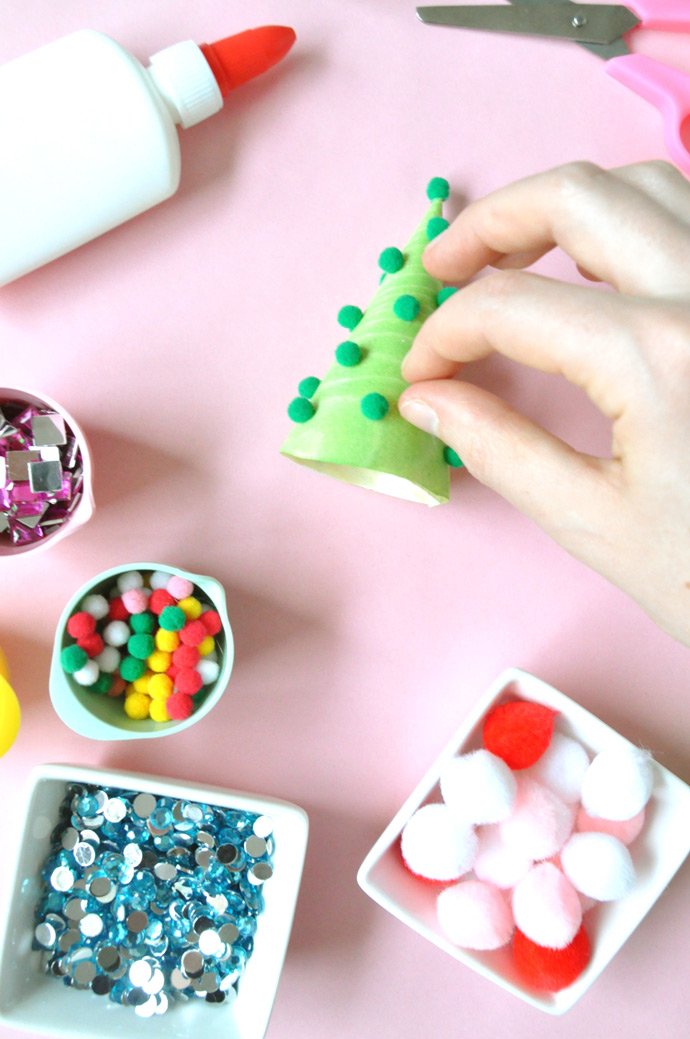
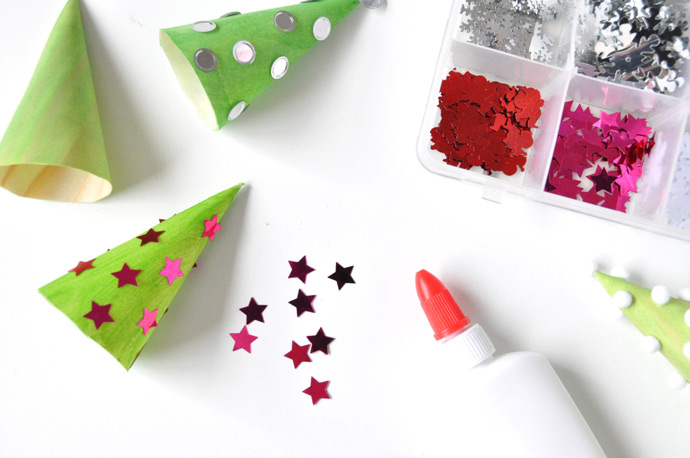
Time to trim the trees! Use white glue and sequins, mini pompoms, stickers, etc to jazz up the trees.

DIY Wooden Christmas Trees DIY Wooden Christmas Trees DIY Wooden Christmas Trees

Happy Christmas crafting!

DIY Printable Perpetual Calendar

Dec 15, 2016

DIY Printable Perpetual Calendar

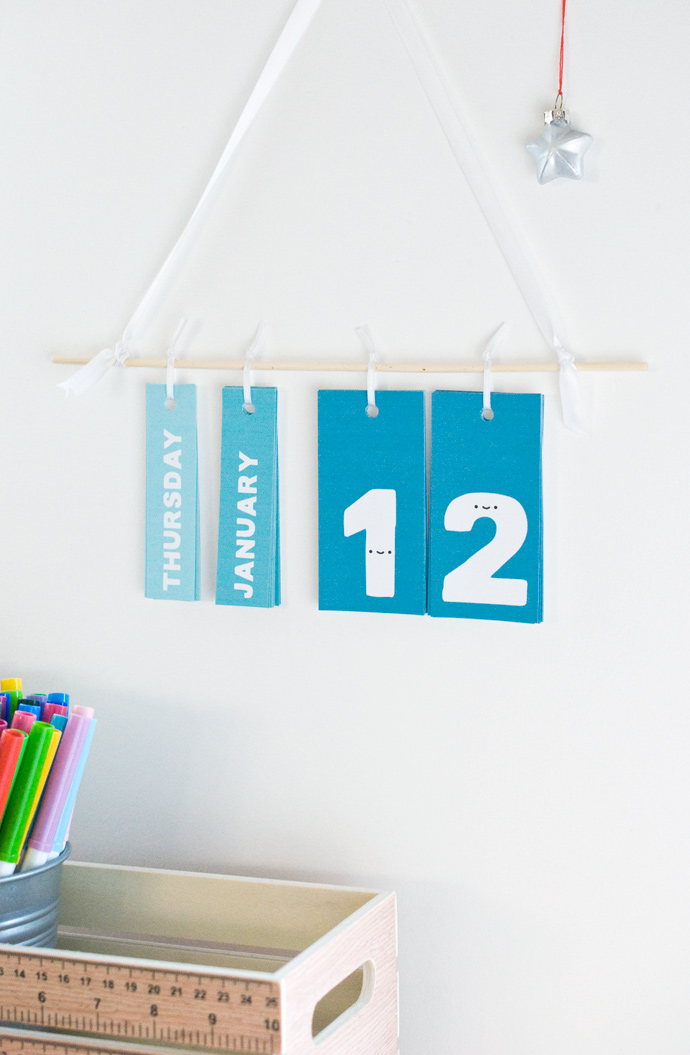
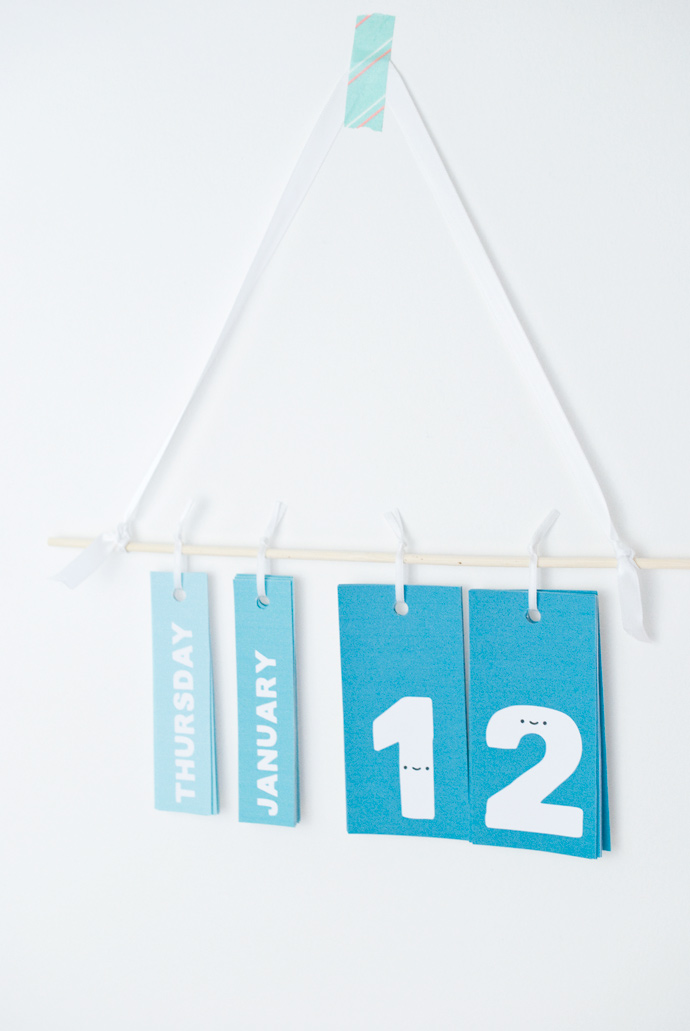
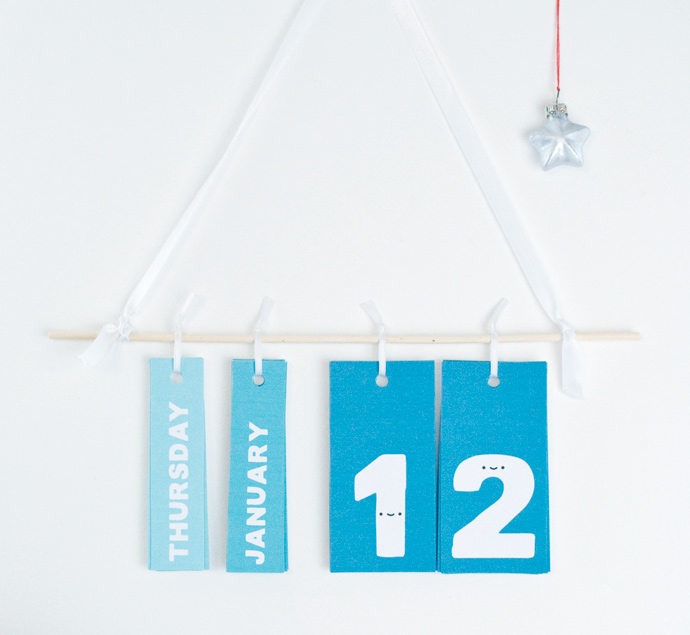
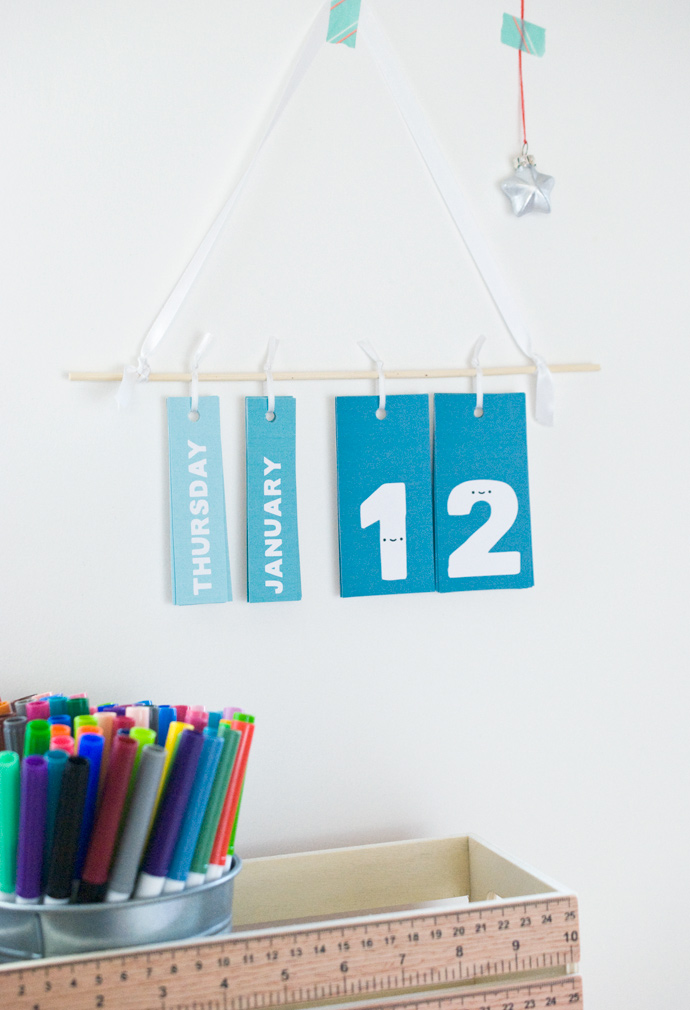
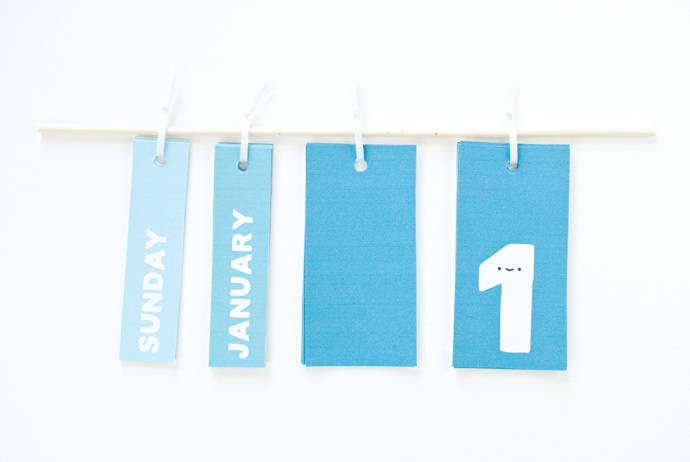
Help your kids keep track of the days with this easy perpetual calendar. It works for any year, which means you can make it and start using it any time! And who doesn’t want some smiling dates greeting them each day?

Little ones will look forward to changing the calendar each day. Plus it gives them the opportunity to learn the days of the week, months of the year, and to see time passing. Older kids can make this all by themselves, and then proudly hang it on their wall.

You can even choose what color you want for your calendar, or print more than one of the PDFs and make a wall hanging with multiple colors!

What You Need

DIY Printable Perpetual Calendar
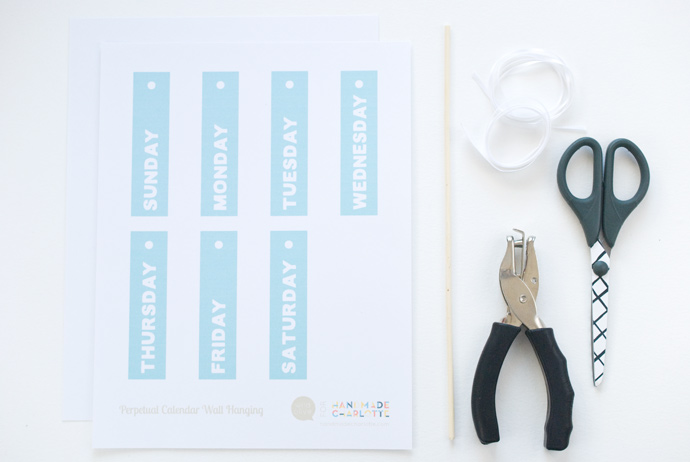
  • Card stock
  • Scissors
  • Hole punch
  • 1/8-inch wide ribbon
  • Thin dowel rod or thick skewer – about 10” long
  • 1/2-inch wide ribbon

Choose a calendar template:

  • Black Perpetual Calendar template (download here)
  • Teal Perpetual Calendar template (download here)
  • Coral Perpetual Calendar template (download here)
  • Lime Perpetual Calendar template (download here)

How-To

DIY Printable Perpetual Calendar

Step 1
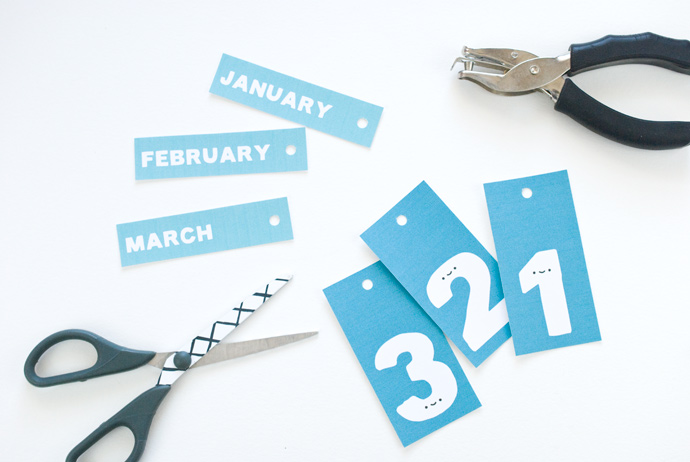
Print the calendar PDF on card stock and cut out each of the pieces. Punch the top with a standard hole punch.

DIY Printable Perpetual Calendar

Step 2
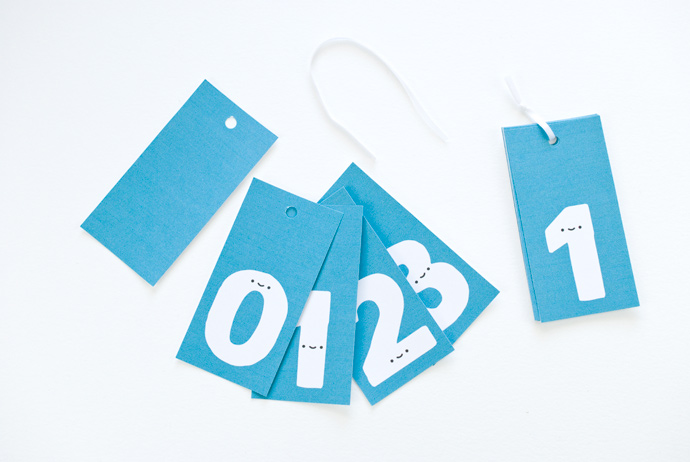
Divide the number pieces into two stacks. One stack should have numerals 0-9 and the other should have 0-3. Put the numbers in order.

If you’d rather, replace the 0 in the smaller stack with the blank rectangle. This way on dates with a single digit you can choose if you want a blank space or a 0 before the number.

Cut a 5-inch piece of thin ribbon for each stack. Thread ribbon through the holes and tie the ends together.

DIY Printable Perpetual Calendar

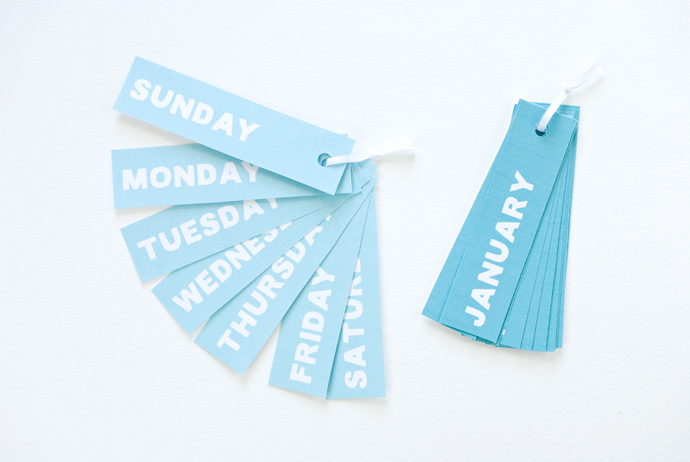
Repeat the stacking and tying process for the days and months. As you tie each stack, try to keep the knots all the same distance from the holes. This will make the calendar hang evenly.

DIY Printable Perpetual Calendar

Step 3
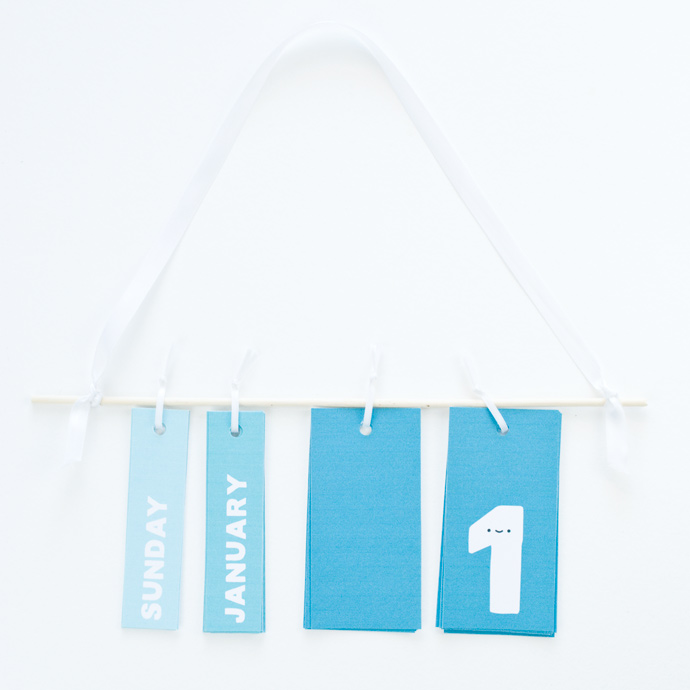
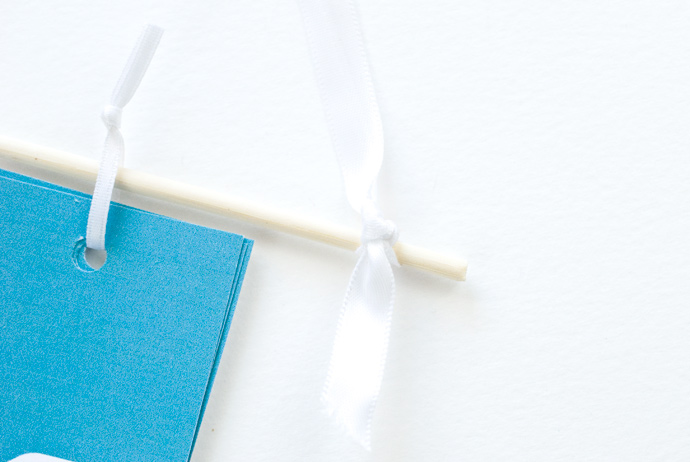
Slide the ribbon hangers over the dowel rod in the order that you want the date to read. For example, in the United States, we would say “Sunday, January 1”. In other parts of the world, you can alter the order to say “Sunday, 1 January.”

DIY Printable Perpetual Calendar

Step 4
Cut a 24-inch piece of wider ribbon and tie each end to the ends of the dowel rod. Adjust the ties and trim the ends so it hangs at the height you want.

DIY Printable Perpetual Calendar

Now your calendar is ready to hang! You’ll need to space the hanging pieces so that the calendar balances.

DIY Printable Perpetual Calendar

Each day, flip over the hanging tag for the day and the date. You’ll find that the ribbon knot may get stuck between the layers of the tags. That’s okay! It will still hang just fine. But of course, you can adjust the ribbons so they look pretty.

DIY Printable Perpetual Calendar

Keep flipping each day as you make your way through the year. And when you finish out the year, your calendar can keep going through the next near and the next!

DIY Printable Perpetual Calendar

Happy crafting!

DIY Advent Garland

DIY Advent Garland

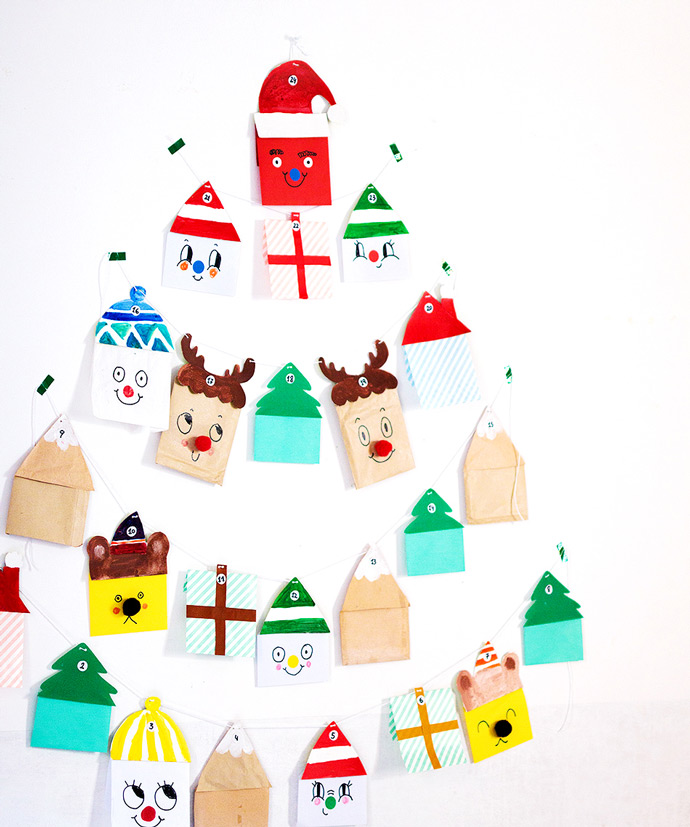
Make this holiday season even more joyful with a handmade Advent garland! All you need is some cord, paper bags, envelopes, the free printable templates, and a little imagination. This easy-to-make project is perfect to enjoy with the kids and guaranteed to put them in the holiday spirit.

DIY Advent Garland

The mini pouches are just big enough to hold a small gift or a sweet message. Later, you can use them as super fun Christmas tree ornaments. Let’s get started!

What You Need

DIY Advent Garland
  • Printable Advent Garland templates (download here)
  • 24 small gifts or messages on paper
  • Small paper bags, envelopes, lunch bags (or any large pieces of paper)
  • Empty cereal boxes
  • Colored paper
  • Pom-poms
  • Stamps or pen
  • Round stickers
  • Cord
  • Paint
  • Tape
  • Scissors

How-To

DIY Advent Garland

Step 1

Download, print and cut out the printable templates. These will be used to make the paper bag toppers. There are multiple designs that you can repeat for each day of the Advent calendar.

Draw and paint shapes onto the cardboard from the cereal box. Alternatively, you can use colored paper to make them (as I did on the tree or the gift) or reuse craft paper and paint (like the mountain design pictured).

DIY Advent Garland

Step 2
Cut out colored paper, paint recycled cardboard or reuse large pieces of paper until you have a total of 24 toppers. Punch two small holes centered on the top of each shape.

DIY Advent Garland

Step 3
Time to make the pouches!

  1. 
Use small paper bags to make 24 paper pouches, each roughly 4″ by 5″. Recycled envelopes or large pieces of paper will work as well.
  2. Fill the pouches with your favorite goodies and gifts. If the paper bag is too big for the topper, fold top corners at the back to make it smaller. Take the top of each paper bag and tape it to the topper, backs together. 
 Now your little bag mountain is ready to go!
  3. Repeat for the tree bag.
  4. Use decorated bags or paint any pattern to get a cute and colorful advent calendar (as I did for the house).
DIY Advent Garland

Step 4
Time to make the gift bag
~! Use patterned bags or paint plain bags with stripes or dots. Cut out two pieces of colored paper 5.5″ long by 0.7″ wide. Glue them, crossed together and centered, onto the paper bag. Make a tag by folding the top of the colored paper and punch two small holes. Fold and glue the excess colored paper on the back.

DIY Advent Garland

Step 5
Draw funny faces for the advent calendar characters. Add pom-poms or stickers to use as eyes, noses, etc.

DIY Advent Garland

Step 6
Thread Santa with a small piece of cord and tie it to hang on top of the advent calendar. Use a long piece of cord to thread top bags into different strands of garland.

DIY Advent Garland

Step 7
Tape and arrange garlands in a pyramid shape on the wall. Hang Santa on top and then make the first chain, threading three bags for the first chain, five bags for the second, seven bags for the third, and five for the bottom chain.

DIY Advent Garland

Step 8
For the numbers, I used black round stickers with written numbers. You can use stamps or other decorative elements to add numbers to the pouches.

DIY Advent Garland

That’s it! Now you and the kids can start the exciting countdown and make the holiday season even merrier. Happy crafting!!

Thankful Turkey Activity Boxes

Nov 29, 2016

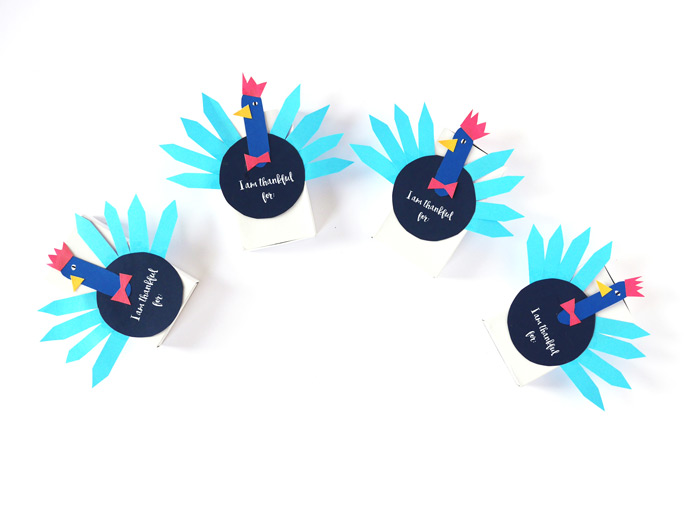
DIY Thankful Box Craft for Thanksgiving

Thanksgiving can be a long day for kids. It’s always exciting and overwhelming at the same time, especially since all the adults are busy prepping for dinner. With this in mind, I always find a way to keep the kids entertained – something that requires a little bit of focus but is still fun.

Thanksgiving is a time in our family when we take a moment to really think about what we’re thankful for. We take the opportunity to write these things down and keep them as memories for the rest of the year. Even the grown ups get involved!

DIY Thankful Box Craft for Thanksgiving

I came up with these paper-craft turkey boxes with my kids. We actually did similar boxes last year, so this year we reopened them to remind ourselves of what we wrote last year! All the kids cut and make their own turkey with colored construction paper. It’s so simple! Then of course we write down all the things we’re thankful for onto slips of paper, and put them into the box. Happy Thanksgiving!

DIY Thankful Box Craft for Thanksgiving

What You Need

DIY Thanksgiving Turkey Activity Boxes
  • Colored construction paper
  • Scissors
  • Glue stick
  • Craft matchboxes
  • Compass
  • White-out
  • Black pencil
  • White pencil

How-To

DIY Thankful Box Craft for Thanksgiving
  1. Draw a circle onto colored construction paper and cut it out.
  2. For the turkey’s neck, pick a contrasting color and cut a long rectangle with rounded corners. For the nose, cut a small triangle out of construction paper and glue it onto the neck. Then glue the neck and nose onto the circle.
  3. Draw the turkey’s eye with whiteout. To make the turkey’s accessories, cut a crown and bow out of paper and then glue them onto your turkey.
  4. To make the tail feathers, cut long strips of construction paper with triangles on the ends. Glue each of the feathers onto the back of the turkey.
  5. Finally glue the turkey on top of a craft matchbox.
DIY Thankful Box Craft for Thanksgiving
  1. And the final step: cut paper slips and write down what you’re thankful for. Put these papers into your box.
8-copy-2 DIY Thankful Box Craft for Thanksgiving

Happy crafting!

DIY Wood Block Turkeys

DIY Wooden Turkey Decor

Fall is one of my favorite seasons, but boy does it fly by. After Halloween it’s my daughter’s birthday and then Thanksgiving – it’s non-stop! But it’s a good busy, so I can’t complain. As you might know, I am French so Thanksgiving wasn’t a part of my family’s tradition. But since moving to America seventeen years ago, I’ve been celebrating Thanksgiving. I really enjoy taking the time to be thankful, and I make sure to encourage my kids to be thankful too.

DIY Wooden Turkey Decor

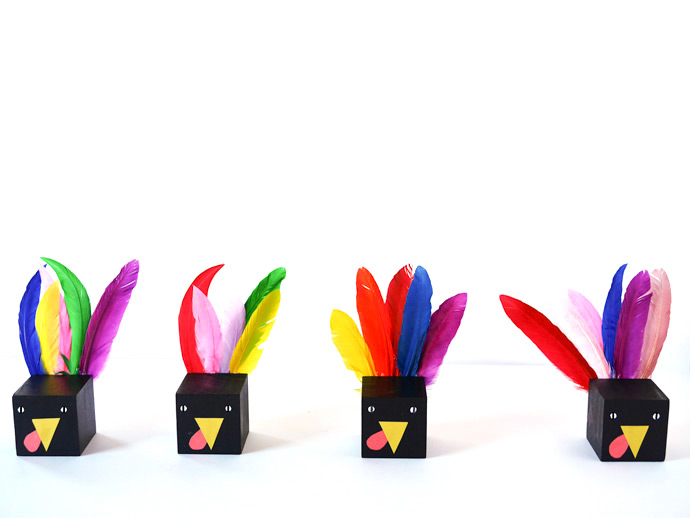
This past weekend, we spent time preparing for Thanksgiving and now the house now is ready! I came up with these colorful turkeys – aren’t they fun? You can use them to decorate all over the house, set them up as a centerpiece, or use them as place cards – just write your guests’ names on them. Or if you need an activity to keep the kids busy, have them make these turkeys! Let’s get crafting!

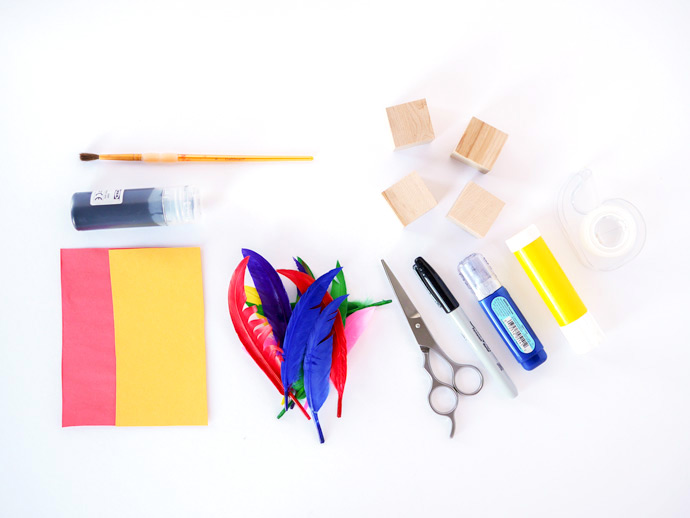
What You Need

DIY Wooden Turkey Decor
  • Wooden cubes (or small boxes)
  • Black paint
  • Paintbrush
  • Construction paper
  • Craft feathers
  • Scissors
  • Tape
  • Glue
  • Pencil
  • White out

How-To

DIY Wooden Turkey Decor
  1. Paint the cubes black and let dry.
  2. In the mean time, cut triangles out of yellow construction paper and raindrops out of red paper. Set aside.
  3. When the cubes are dry, glue down the red raindrop shape and then glue the triangle beak on top to make the turkey faces.
  4. Use white out to make the eyes and draw the pupils with pencil.
  5. Pick out some colored feathers and glue them onto the back of your cube. Let dry.
DIY Wooden Turkey Decor DIY Wooden Turkey Decor

Voila! Happy Thanksgiving!!

Forest Puppets Dreamer Pad

Nov 21, 2016

Forest Puppets Dreamer Pad

Dream on, dreamers! We can’t stop talking about our new line of kids’ craft kits and supplies available at Michaels nationwide – Handmade Charlotte Kids! Today we’re sharing a closer look at the Forest Puppets Dreamer Pad, one of the three dreamer pads in the line – see the other two here and here! Create your own puppet play using all the playful characters included in the activity book.

Forest Puppets Dreamer Pad

This dreamer pad even includes activity sheets and SO many beautiful stickers for hours of creative fun. Stage a puppet show featuring lumberjacks, Mr. Fox, a unicorn, and all your wildlife friends – we have a feeling your audience will be begging for an encore. ;) Keep reading for a closer look at everything included in the kit!

Forest Puppets Dreamer Pad

Contents

edit2image-30
  • 50 brads
  • 12 straws
  • 10 page activity pad
  • 1 sheet of glue dots
  • 1 storage envelope

How-To

Forest Puppets Dreamer Pad

Step 1
Pop the shapes out of the activity book along the perforated lines.

Forest Puppets Dreamer Pad

Step 2
Use the brads to attach the limbs onto the bodies of the characters through the pre-punched holes.

Forest Puppets Dreamer Pad

Step 3
Apply a glue dot onto the back of the paper puppet and attach a straw. Voila! Continue popping out the paper props and backgrounds and perform a play for your friends!

Forest Puppets Dreamer Pad Forest Puppets Dreamer Pad Forest Puppets Dreamer Pad Forest Puppets Dreamer Pad

What story will you tell with these colorful wildlife puppets? Share your photos with us using #HCKidsClub!

Live from Mt. Pom-Pom

Meet the Artist

Misaki Kawai Studio

Japanese artist Misaki Kazwai works with just about every medium possible – paintings, sculptures, wall murals, furniture, toys, books, even writing her own music. Born to an architect father and a mother who liked to sew and make puppets, her psychedelic craft-art is clearly the perfect combination of their influences. We’re hooked!

Misaki Kawai

“The Doggy Dog” (2011, Malmo Konsthall)

Misaki Kawai

“Big Bubble” exhibition (2011, Malmo Konsthall)

Misaki Kawai

“Wet Shiny Surprise” exhibition (2011, LOYAL Gallery)

Children

Children’s furniture, “Love from Mt. Pom Pom” exhibition (2012, CMA NYC)

Misaki Kawai

Be sure to check out Misaki Kawai’s super fun online shop!

DIY Emoji Bubble Necklaces

Nov 13, 2016

DIY Emoji Bubble Necklaces

Do you have a favorite emoji? There are sooo many to choose from, it’s nearly impossible! One of the craft kits available in our new Handmade Charlotte Kids line is this Emoji Me Bubble Necklace – you can turn your favorite emoji into a fun necklace! Each kit includes nine bubble beads, emoji stickers, pom poms, and matching accessories – enough to make three awesome necklaces.

DIY Emoji Bubble Necklaces

And a secret bonus – you can include a secret note or wish inside your bubble bead! There are some great emoji-themed options in the kit, or make your own custom note to add in too. We love how fun it is to create your own custom accessories – wouldn’t it be cool to throw an emoji-themed necklace craft slumber party? Keep reading for even more photos of these playful necklaces. Everything you need is included in the kit available online and in Michaels stores online. :)

DIY Emoji Bubble Necklaces

Contents

DIY Emoji Bubble Necklaces
  • 9 bubble beads
  • Ribbon
  • Stickers
  • 12 beads
  • Sequins
  • 6 buttons
  • 6 felt shapes
  • 42 pompoms
  • Satin cord
  • 3 safety clasps
  • 9 jump rings
  • Paper notes
  • Sticky seals
  • Instructions

How-To

DIY Emoji Bubble Necklaces

Step 1
Fill the yellow bubble beads with yellow pompoms. You can even include a secret note inside!

DIY Emoji Bubble Necklaces

Step 2
Add an emoji face onto the front of the bubble bead using the stickers included in your kit.

DIY Emoji Bubble Necklaces

Step 3
For the clear bubble beads, fill with the pink and purple pompoms, beads, sequins, felt shapes, and buttons. You can mix and match or sort by color – have fun with it!

DIY Emoji Bubble Necklaces

Step 4
Close all the bubble beads and use the round sticky seals to keep the bubbles closed.

DIY Emoji Bubble Necklaces

Step 5
Put a jump ring onto each bubble bead and then thread onto the satin cord. Tie a knot around each jump ring to keep the bead in place.

DIY Emoji Bubble Necklaces

Step 6
Thread the safety clasp onto each end of the satin cord and tie a knot on each end as shown.

DIY Emoji Bubble Necklaces

Step 7
Tie the pink ribbon into a bow around the cord and voila: you’ve got a colorful new necklace!

DIY Emoji Bubble Necklaces DIY Emoji Bubble Necklaces DIY Emoji Bubble Necklaces DIY Emoji Bubble Necklaces

Pick up your own Emoji Me Bubble Necklace right here!! Happy crafting! :)
No-Sew Felt Pumpkin Table Runner

No-Sew Felt Pumpkin Table Runner

Invite your kids to help with some Thanksgiving decorating this year by making this easy no-sew table runner. It really is as simple as cutting out some felt pieces and gluing them in a row.

Younger children may need a little extra help, but older kids can do this all on their own. And they’ll be so proud when you use this runner on the kids’ table (or even on your coffee table) come Thanksgiving.

No-Sew Felt Pumpkin Table Runner

Want to ensure that this looks a little less like a “kid craft” and a little more like something you want to display in your home? One of the easiest ways is to choose colors of felt that YOU like. A runner made of pastel pumpkins or all white “ghost” pumpkins might be more your style than bright orange.

And of course, the size is easy to adjust by using as many or as few pumpkins as you want. Make it just the right size for your home!

What You Need

No-Sew Felt Pumpkin Table Runner
  • Pumpkin Table Runner template (download here)
  • Wool blend felt (in several pumpkin colors + tan)
  • Pins
  • Scissors
  • Fabric glue

How-To

No-Sew Felt Pumpkin Table Runner

Step 1
Print the pumpkin templates on regular printer paper and cut them out. Pin the pieces to the felt and cut around them.

Cut several pumpkin shapes from each color of felt and cut out a tan stem for each pumpkin.

No-Sew Felt Pumpkin Table Runner

Step 2
Glue the stems to the top of the pumpkins with a bit of fabric glue.

No-Sew Felt Pumpkin Table Runner

Step 3
Arrange the pumpkins in a row so they overlap. Play around with the layout a bit until it looks like you want it to.

Leave them laying flat and start gluing them together where they overlap. Don’t use too much glue or it will squeeze out and get messy!

No-Sew Felt Pumpkin Table Runner

After the pumpkins have had time to dry, your table runner is ready to set up your Thanksgiving kids’ table!

No-Sew Felt Pumpkin Table Runner

The simplicity of this runner makes it easy to dress up with a few candles or other basic table decor. It’s also pretty enough to use on a coffee table or other areas that aren’t just designed for kids.

To dress it up a little more, try adding some lines of embroidery stitches to define the ridges of the pumpkin.

No-Sew Felt Pumpkin Table Runner No-Sew Felt Pumpkin Table Runner

To make this project a little easier for young children who are still practicing their scissor skills, have them cut the pumpkins from colored paper instead of felt.

Instead of making a runner, cluster the pumpkins together to make placemats!

And no matter how smooth (or rough) the edges looks or how gluey the seams get, be sure to thank your little crafter for helping with the decorations!

Happy crafting!
DIY Cassette Tape Gift Wrap

DIY Cassette Tape Gift Wrap

Did you make custom mix tapes for friends and family when you were growing up? We sure did! Now that cassette tapes are almost obsolete, we miss that hobby more than ever. We decided that instead of giving actual mix tapes as gifts, we would use them to inspire our gift wrap this holiday season.

DIY Cassette Tape Gift Wrap

At first glance, these cassette-inspired gifts look fairly straight-forward. But if you look along the bottom edge you’ll find a secret message—we used Scotch® Magic Tape to write a personalized holiday message for each gift, When you give these gifts to your friends and family, have them give a little tug to the exposed cassette ribbon to reveal the rest of the message. It’s just like magic!

To take care of everyone on your list, we’ve provided a handful of free cassette tape printables in a variety of fun holiday colors. Along with some matching wrapping paper, Scotch® Magic Tape, and Scotch® Double Sided Tape, you’ll be on your way to a rockin’ wrapping job!

DIY Cassette Tape Gift Wrap

What You Need

DIY Cassette Tape Gift Wrap
  • Cassette Tape Gift Wrap templates (download here)
  • Wrapping paper to match your chosen printable(s)
  • Scotch® Magic Tape
  • Scotch® Double Sided Tape
  • Cutting mat
  • Craft knife
  • Pencil
  • Black pen/marker
  • Fine-tip white paint pen
  • Ruler
  • Scissors
  • Black (or any dark color) tissue paper
  • Your gift, in a rectangular box

How-To

DIY Cassette Tape Gift Wrap

Step 1
On a flat work surface, roll out your wrapping paper and place your rectangular gift box on top. The box we used was 8 3/4” by 5 3/4” so we cut a piece of blue wrapping paper to 15” by 20”. We used blue wrapping paper to match the blue cassette tape printable that we had already sized, printed, and cut out to fit our gift box.

DIY Cassette Tape Gift Wrap

Step 2
Place the gift box face down onto the cut wrapping paper so that the long side of the box is about 5” away from the 15” long edge of the wrapping paper. Use a pencil to trace around the box, and then trace the thin front side of the box too, so that it’s now about 4” away from the edge of the wrapping paper. This thin rectangle is where we cut smaller windows to imitate the bottom of a cassette tape.

The size of these windows will vary depending on the size of your gift box, but the general look should be the same: three longer rectangles with two smaller ones in between. Use a pencil and ruler to space them evenly within the rectangle – our larger rectangles were 1 1/2” long by 3/4” wide and the smaller ones were 3/8” long by 1/2” wide (we kept them at least 1/4” from the edges). Once you are happy with the shapes, use a craft knife, ruler, and cutting mat to cut them out.

DIY Cassette Tape Gift Wrap

Step 3
Cut a contrasting piece of wrapping paper (or matching, your preference) the same size as the thin rectangle on the front of the box. Apply Scotch® Double Sided Tape and attach the paper to the front of the box. This way, the plain box won’t be visible through the windows we just cut.

DIY Cassette Tape Gift Wrap

Step 4
Time to make the cassette tape ribbon! Start by laying out a sheet of black (or any dark color) tissue paper. Next, apply a long piece of Scotch® Magic Tape along the length, smoothing as you go. Make a few long lines of tape in this way, and then use a ruler and craft knife to cut the strips out. On the taped side of the strip, use a paint pen to write a message. We wrote holiday wishes and Christmas carol lyrics, but get creative! Be sure to let the paint/pen/ink dry thoroughly to avoid smudging.

DIY Cassette Tape Gift Wrap

Step 5
Once the ink is dry, wrap the cassette tape around the gift. If one strip isn’t long enough, attach two pieces together. Use a tiny piece of Scotch® Magic Tape to attach one end of the cassette ribbon onto the box and another tiny piece to attach the other end of the cassette ribbon to the box. It’s okay if they overlap a little (as shown in the image above). Be sure to use as small a piece as you can manage. If you attach it too well, you may have trouble later trying to pull the cassette ribbon out to reveal the message!

DIY Cassette Tape Gift Wrap

Step 6
Place the gift box back, face down, on the wrapping paper where you traced it before. Make sure the text on the ribbon is upside down for now and that the overlapping taped cassette ribbon isn’t on the side with the windows. Wrap your present as you would normally, taking extra care around the windows. Use Scotch® Magic Tape to secure the wrapping paper on the bottom of the gift box, and once you’ve folded the ends in, secure those as well.

DIY Cassette Tape Gift Wrap

Step 7
Use Scotch® Double Sided Tape to attach the cassette printable onto the top of the wrapped gift box. Make sure that the bottom of the cassette faces the edge where the windows are. To finish up, write a fun message in the blank space on the cassette tape!

DIY Cassette Tape Gift Wrap DIY Cassette Tape Gift Wrap DIY Cassette Tape Gift Wrap

Happy wrapping!

This post is sponsored by Scotch.

 
Copyright © -2012 Colection hand made All Rights Reserved | Template Design by Favorite Blogger Templates | Blogger Tips and Tricks