Twitter Facebook Google Plus LinkedIn RSS Feed Email

DIY Candy Pretzel Necklace

Apr 22, 2017

DIY Candy Pretzel Necklace

Did you know that April is National Soft Pretzel Month?  That is definitely something worth celebrating!  Pretzels are such a traditional snack food, and candy necklaces are a classic party favor.  I figured we could marry the two, for an adorable “twist” on the candy necklace!

DIY Candy Pretzel Necklace

Can’t you imagine some little fashionistas stylin’ in these pretzel necklaces?  Planning parties for kids is my favorite because you can let your inner child come out to play.  I enjoy using activities, favors, and snacks that kids adore while trying to get creative with the presentation.  Sometimes I wonder if the kids have as much fun at the party, as I had planning it!

DIY Candy Pretzel Necklace

You don’t have to have a pretzel-themed party to use these necklaces, although I think that could be adorable!  Candy pretzel jewelry would be fun for guests to wear, make at the party, or take home in favor bags.  However, I would not recommend eating the candy off the wire…we don’t want to send kids home with chipped teeth!  Be sure to instruct kiddos or parents to untwist one end of the necklace to release the candy.

DIY Candy Pretzel Necklace

Now… let’s do this!

What You Need

DIY Candy Pretzel Necklace
  • Candy bracelets
  • .64mm aluminum wire (pink!)
  • Scissors
  • Tape Measurer
  • Bowl
  • ¼ yd. jersey knit fabric

How-To

Step 1
Cut the string on several candy bracelets, and release the candy pieces into a bowl.

DIY Candy Pretzel Necklace

Step 2
Cut a 15” piece of wire, using scissors or a wire cutter.  String the candy pieces onto the wire, leaving about 1.5” open on each end.

DIY Candy Pretzel Necklace

Step 3
Hold each end of the wire by the top candy pieces to keep everything in place.  Carefully fold the wire into a pretzel by rounding the piece into a circle, crossing the top ends into an “x”, and placing the ends at the bottom, with about 5 pieces of candy between each end.

DIY Candy Pretzel Necklace DIY Candy Pretzel Necklace

Step 4
Twist each end of the wire between two pieces of candy, with the 5 pieces spaced between.  Wrap the wire tightly, and cut off or tightly squeeze in the final ends, so that it will not scratch any kiddos!

DIY Candy Pretzel Necklace

Step 5
Cut a 30” long piece of jersey knit fabric, about 1” wide.  Slide it through the pretzel with the first end going through the top right side, and coming back through under the top left side of the pretzel.

Step 6
Bring the two ends of the fabric together, and line them up evenly.  Tie them in a knot, about 2” from the top.
DIY Candy Pretzel Necklace

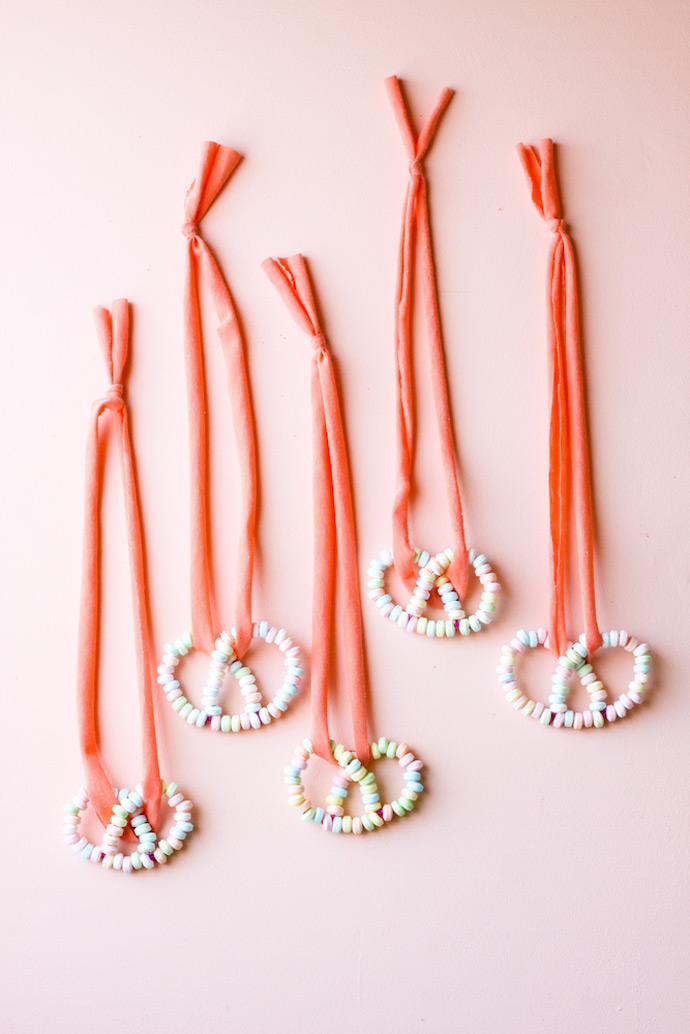
Voila!  Now you have a unique candy necklace. Happy crafting!

DIY Floral Toy Clock

DIY Floral Toy Clock

Who needs a watch when you can use flowers to tell the time? Make this charming flower chart that doubles as a fun clock to teach your kids to read time. Recently I learned about Linnaeus’ flower clock – it was created by Carolus Linnaeus who had the brilliant idea to use the opening and closing of different plants and flowers to tell the time. You can read more about it here!

Whether or not your kids are already fascinated with clocks, this is the perfect craft project now that spring is finally here – plus, it’s a great excuse to wander around nearby parks and gardens. Printable templates of the floral clock faces are ready for you to download below, one including the names of the flowers and another blank option you can fill in yourself.

DIY Floral Toy Clock

Go out with your children to a park or forest and encourage them to take the printable observation journal with them.

They can make notes, take photographs, or draw the different types of flowers that they see and then add colors, drawings, descriptions, photographs, or even real leaves and flowers on their floral clock. Get creative and have fun!

DIY Floral Toy Clock

What You Need

DIY Floral Toy Clock
  • Printable templates (download here)
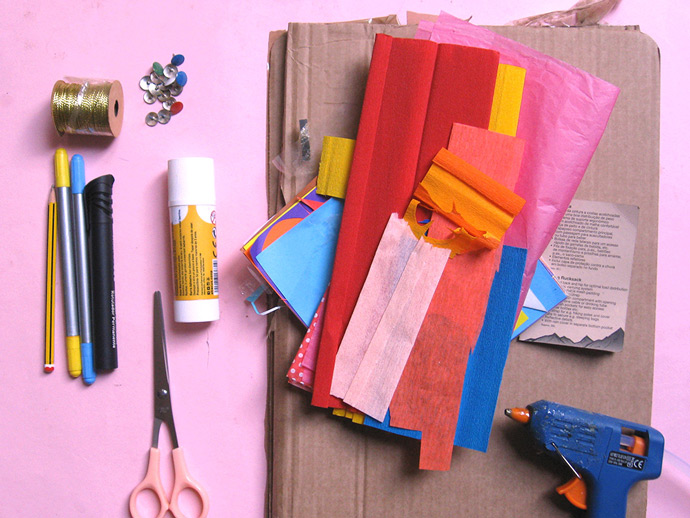
  • Crepe and tissue paper
  • Colored or patterned paper
  • Cardboard (corrugated and thin)
  • Thumbtacks
  • Cord
  • Scissors
  • Hot glue gun
  • Glue stick
  • Markers, paint, or colored pens

How-To

DIY Floral Toy Clock

Step 1
Download the printable templates containing the clock face, hand, journal, and flower templates. Print out copies of the flower observation journal page on plain paper and go out with your kids to observe flowers, taking photographs and notes. First, they’ll have to identify a selection of flowers that open and close at regular hours. You can help them look for specific plants and flowers by referring to books or looking for details online ahead of time.

DIY Floral Toy Clock

Step 2
Print the blank paper clock face template and fill it in with your observed flowers around clock. Color it in or cut out the big flower templates and transfer them onto colored paper, and then glue onto the clock. You can instead print out any of the clock face templates with my selection of flowers to make it faster.

DIY Floral Toy Clock

Step 3
Cut out a 10” circle from corrugated cardboard and cut out the clock hand from thinner cardboard. Paint them or cover with colored paper. Poke a thumbtack onto the marked spot on the hand to make a hole. Pick one of the printed clock faces and glue it onto the center of the cardboard circle. Place the hand over the hole and secure with a thumbtack. Cut small pieces of cardboard and attach to the backside of the clock to cover the sharp end of the thumbtack.

Step 4
Now it’s time to make flowers! Draw your own flower shapes and leaves, then cut them out from crepe and tissue paper. Or, you can use the printable flower templates and transfer them to crepe/tissue paper. Use the flower circle shape to cut circles from layered tissue paper, fold in a half and then cut tiny slits into the curved edge, following the templates. Create an extra layer of petals by cutting the second layer of tissue paper a little bit smaller than the first. Place your flowers and leaves onto the clock face around hours.

Step 5
Finish up the crepe flowers with fringed centers or by adding long, thin strips of crepe paper. Don’t forget to add leaves too! Pin the petals, centers, and leaves together using a colored thumbtack. Shape the crepe petals with your fingers, curling each side of the petal. Take the tissue flowers and fold them to form creases, and then open them back up and pin the center on with a thumbtack. Separate the layers of the flowers, fluffing them up into the center.

DIY Floral Toy Clock

Step 6
Arrange and pin the paper flowers around the clock face. Lay the clock down and glue a loop of cord to the top of the back, for hanging. Glue small pieces of cardboard to cover thumbtack ends as before.

DIY Floral Toy Clock

Step 7
As an added bonus, you can install a real clock mechanism to make your floral wall clock actually work! Otherwise, you can hang your new Linnaeus’ Floral Clock on the Wall and let your kids play while learning about numbers, hours and flowers.

DIY Floral Toy Clock DIY Floral Toy Clock

Happy crafting!

How to Make an Off-the-Grid Dollhouse: Part 5

Apr 6, 2017

How to Make an Off-the-Grid Dollhouse: Part 5

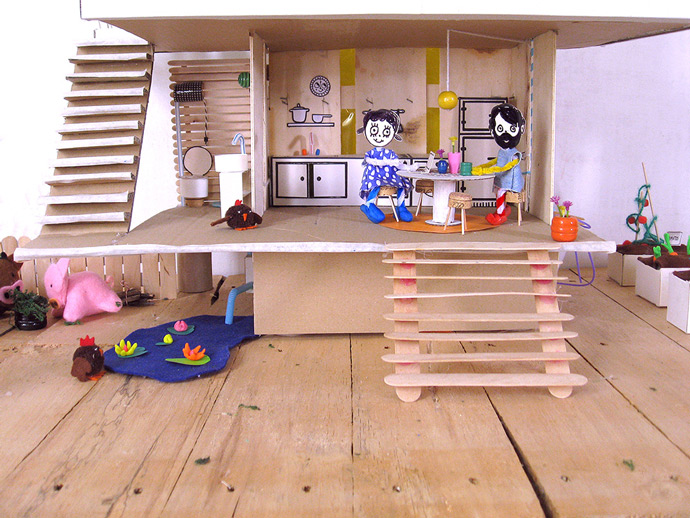
In today’s tutorial, we’ll be working on the kitchen, pond, and gray water systems! We’ll make the kitchen appliances, a simple compost toilet, a wetland pond and wastewater recycling systems for our off-the-grid dollhouse.

In this chapter, we’ll learn how to set up our dollhouse so that it’s off the sewer line and deal with waste (especially sewage) in our own eco-friendly way! We’ll separate gray water (waste water from the shower, washer, and sinks) from black water (from the toilet) to reduce water overall water usage and make our own compost. With these recycling systems, our doll house will minimize its impact on nature. Gather up some empty cardboard boxes, drinking straws, felt, and paper to craft along with this new tutorial!

Kitchen Appliances

How to Make an Off-the-Grid Dollhouse: Part 5

Our dollhouse has an eco-friendly kitchen, with energy efficient appliances including an induction oven, refrigerator and washing machine.

What You Need
  • Printable templates (download here)
  • Cereal boxes
  • Thin bendy drinking straws
  • Play dough
  • Hot glue gun
  • Craft knife
  • Marker
  • Scissors

How-To
How to Make an Off-the-Grid Dollhouse: Part 5
  1. Download and print the kitchen appliance template. Glue the printed paper onto cardboard cereal boxes.
  2. Cut out the templates from the cardboard. The refrigerator template only has three sides, but you can add a fourth side and a base to make it sturdier if you like.
  3. Do the same for the all-in-one kitchen cabinet template (which includes the sink, oven, and washer).
How to Make an Off-the-Grid Dollhouse: Part 5
  1. Fold and glue the templates together.
  2. Cut a piece of bendy straw to make the faucet, leaving 1/2” from the flexible part to the top end. Shape two tiny play dough balls to be the knobs.
  3. Glue the faucet on top of the cabinet, centered over the sink, with one play dough ball on each side.
  4. Using a craft knife to cut along the lines of the oven and cabinet doors so that they can fold open, as if on hinges.
How to Make an Off-the-Grid Dollhouse: Part 5
  1. Set the cabinets and refrigerator into the kitchen. Make sure that the plumbing and electrical wiring are in the right places to supply the electrical appliances, faucet, and washer.

DINING ROOM FURNITURE: TABLE AND STOOLS

What You Need
  • Cardboard
  • Colored/patterned paper
  • Felt
  • Two corks
  • Paint
  • Hot glue gun
  • Toothpicks
  • Craft knife
  • Scissors

How-To
How to Make an Off-the-Grid Dollhouse: Part 5
  1. Cut out several circles from colored or patterned paper and felt to be carpets and tablecloths.
  2. Cut a circle from the cardboard to be the tabletop and paint it white. Cut a much smaller cardboard circle (slightly larger than the cork) for the table’s base, and paint this white too.
  3. Glue the cork onto the small cardboard circle and then glue the large cardboard circle on top of the cork.
  4. Paint the cork white to match the table.
  5. To make the stools, you’ll need a cork and some toothpicks.
  6. Slice cork into four pieces and cut the toothpicks in half.
  7. Poke each piece of cork with three toothpick halves. Adjust the toothpicks’ positions until the stools stand evenly.
  8. Glue a paper tablecloth on top of the table, and center it on your favorite felt rug, setting the stools around it.

Decorate the kitchen with small plastic caps and tiny plastic or dried flowers.

GRAY WATER RECYCLING

Now we’re going to create a simple gray water recycling system. Grey water and water waste will be collected from the shower, bathroom sink, washer and kitchen sink and treated by a filter tank. It will be reused later for flushing the toilet, in the shower, and bathroom faucet.

What You Need
  • Bendy drinking straws (in different colors)
  • Felt
  • Small empty cardboard box
  • Toilet paper roll
  • Scissors
  • Hot glue gun

How-To
How to Make an Off-the-Grid Dollhouse: Part 5
  1. To make the filter tank and plumbing: turn the doll house upside-down and glue the small cardboard box centered under the bathroom and kitchen wall. Cut two different colored bendy straws and glue them to one side of the box, one color for the wastewater (green) and another for the clear water (blue).
  2. Cut another green bendy straw and glue it on the opposite side of the filter tank. This will be the pipe for the kitchen wastewater, so place it under the kitchen sink and washer.
  3. Attach another green bendy straw from the filter tank to the bathroom sink and shower.
  4. Now let’s install recycled clear water pipes that go from the filter tank to the bathroom sink, shower and toilet. Glue a piece of blue bendy straw from the filter tank and up to the bathroom floor.
  5. Attach more blue straws until you reach the toilet. Your grey water recycling system is now complete!

Pond

Our man-made pond will also help with treating sewage. Water, soil, plants and animals will all live together in an ecosystem. Water plants such as sedges, rushes, and grasses will keep our pond algae-free and use the contaminants from the gray water as nutrients. At the bottom of the pond, there’s a filter bed of sand and gravel. Frogs and fish will reduce pests such as mosquitos.

What You Need
  • Pond and lily pad templates (download here)
  • Play dough
  • Colored paper
  • Scissors

How-To
How to Make an Off-the-Grid Dollhouse: Part 5
  1. Download and print the pond and water lily templates. Cut out lily pad shapes, transfer onto green colored paper, and cut out. Sculpt colorful play dough into flowers for the lily pads
  2. Press to close some of the flowers to look like opening buds and add tiny play dough balls to the centers of the open lilies.
  3. Cut out the pond shape from the template, transfer the shape onto blue felt, and cut out.
  4. Time to install the pond! Place the blue felt on the ground by the dollhouse, with an edge underneath the filter tank straws. Place the paper lily pads and play dough lilies all over the felt.

COMPOSTING TOILET

How to Make an Off-the-Grid Dollhouse: Part 5

A composting toilet will turn bodily waste into nutrient-rich compost to make homemade garden fertilizer. It provides a low-cost, hygienically safe, environmentally friendly sanitation option that produces the most fertile soil. It’s very simple to build and all you need are three parts: a toilet receptacle, a compost bin, and carboniferous materials (such as straw, leaves, or wood shavings) to mix with the waste. The waste will be covered with the carboniferous materials in the compost bin to help with decomposition.

What You Need
  • Toilet paper roll
  • Marker
  • Craft knife
  • Bendy drinking straws (same colors as before)
  • Hot glue gun

How-To
How to Make an Off-the-Grid Dollhouse: Part 5
  1. To make the composting bin, use a marker to draw a small square door onto the toilet paper roll and cut open along three sides using a craft knife.
  2. Cut a small notch into the top of the toilet paper roll to fit the blue straw (clear water pipe) going from the filter tank up to the toilet. This will bring water to the toilet’s high tank water closet to use for flushing. Glue the top of the toilet paper roll to the bottom bathroom floor under the toilet.
  3. This image shows the completed gray water recycling and the composting toilet system.
  4. Turn the doll house right-side up again. The composting toilet door must stay closed during the composting process, but once it’s finished you can open it to take out the compost for fertilizing your garden!
How to Make an Off-the-Grid Dollhouse: Part 5

And stay tuned: in the next chapter, we’ll be making a few more additions to our off-the-grid dollhouse. Happy crafting!

Ping Pong Bunny Cupcake Toppers

Ping Pong Bunny Cupcake Toppers

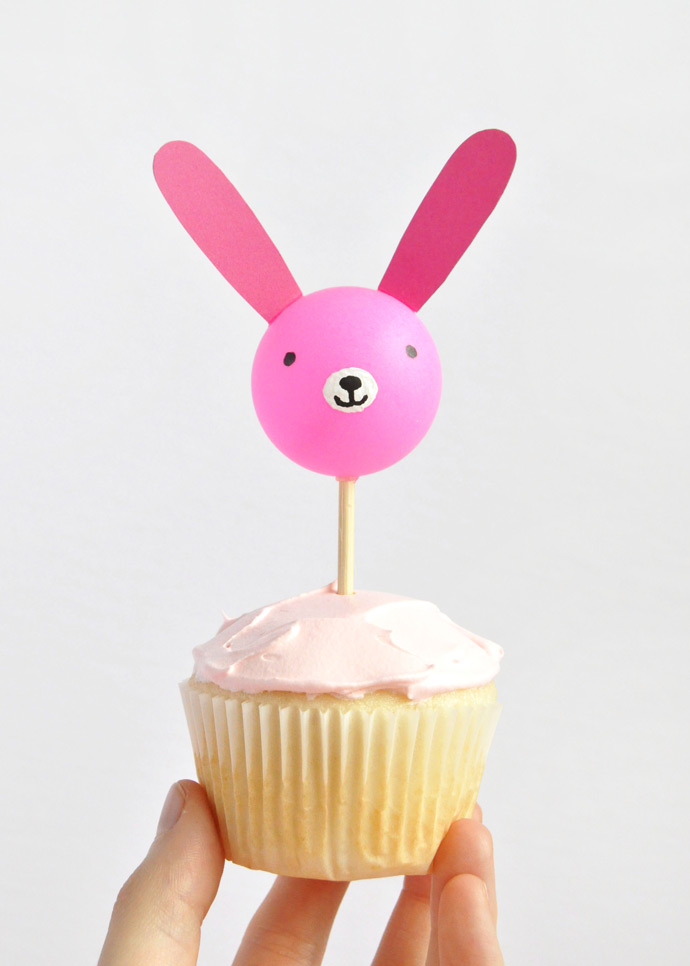
Ping pong balls are becoming one of my favorite crafting supplies – they can be used in so many cool ways! Today I turned these pink ping pong balls I found at the dollar store into cute bunny faces! I love bunnies so I’d use these cupcake toppers all year round, but they’re especially great for Easter.

Ping Pong Bunny Cupcake Toppers

If you can’t get your hands on pink ping pong balls, I think these toppers would be just as cute in white too! Use paint or permanent markers to add details (fur, whiskers, etc) onto the face – I’m sure your bunnies will be the cutest ones around. Happy Easter!

Ping Pong Bunny Cupcake Toppers

What You Need

Ping Pong Bunny Cupcake Toppers
  • Ping pong balls
  • Hot glue gun
  • Cardstock
  • Scissors
  • Black permanent marker
  • Wooden skewers
  • White paint
  • Paintbrush

How-To

Ping Pong Bunny Cupcake Toppers

Step 1
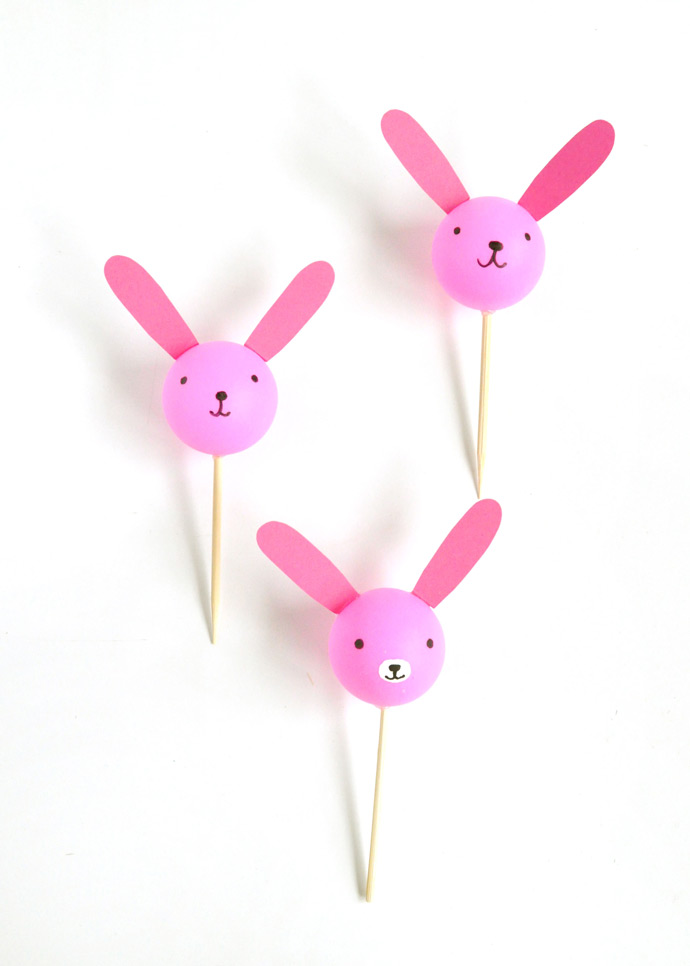
Draw faces onto the ping pong balls. Keep it simple with black permanent marker, or paint a white oval for the mouth patch, let dry, and then draw the mouth on top.

Ping Pong Bunny Cupcake Toppers

Step 2
Cut bunny ears out of cardstock and fold a small flap on the bottom of each one.

Ping Pong Bunny Cupcake Toppers

Step 3
Hot glue the bunny ears onto the bunny faces.

Ping Pong Bunny Cupcake Toppers

Step 4
Cut the ends off of wooden skewers (about 3” long) and hot glue the flat end to the bottom of the bunnies’ heads. Hold in place while the glue dries.

Ping Pong Bunny Cupcake Toppers Ping Pong Bunny Cupcake Toppers Ping Pong Bunny Cupcake Toppers

Happy crafting!

Easter Brunch Citrus Baskets

Easter Brunch Citrus Baskets

When I think of Easter, the first food that comes to mind other than eggs is chocolate. Some of my all-time favorite treats are Easter candies – creme eggs, I’m looking at you! Chocolate really is everywhere at Easter, so I thought why not put together a cute and simple project that showcases a healthier option?

Easter Brunch Citrus Baskets

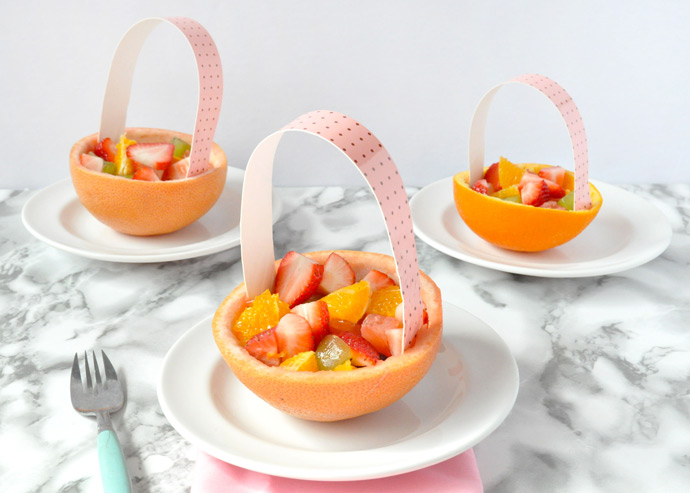
These fruit salad citrus baskets are the perfect snack for Easter brunch – bright, colorful, tasty, and still sweet! This project was inspired by an idea mentioned a vintage book I picked up recently: Betty Crocker’s Party Book. The book says to empty half a grapefruit, add a ribbon as the handle, and then fill the basket with marmalade – we decided to use patterned paper plates for the handle and to fill them with fruit salad instead. This way, everyone gets their own Easter basket!

Easter Brunch Citrus Baskets

What You Need

Easter Brunch Citrus Baskets
  • Cutting board
  • Knife
  • Spoon
  • Scissors
  • Paper plates
  • Oranges and grapefruits

How-To

Easter Brunch Citrus Baskets

Step 1
Cut your oranges and grapefruits in half.

Easter Brunch Citrus Baskets

Step 2
Use a knife and spoon to carefully hollow out the fruit from the peel, putting the fruit in a bowl to the side for now.

Easter Brunch Citrus Baskets

Step 3
Cut a paper plate into strips – these will be the handles for the baskets, so use fun colors or patterns.

Easter Brunch Citrus Baskets

Step 4
Curl the paper plate handle into an upside-down U shape and place into the citrus peel. The handle should stay in place as-is.

Easter Brunch Citrus Baskets

Step 5
Cut up the orange and grapefruit that you removed from the peels, as well as other fruits that you like – we used strawberries, kiwi, and grapes. Serve and enjoy!

Easter Brunch Citrus Baskets Easter Brunch Citrus Baskets Easter Brunch Citrus Baskets

Happy Easter!c

 
Copyright © -2012 Colection hand made All Rights Reserved | Template Design by Favorite Blogger Templates | Blogger Tips and Tricks